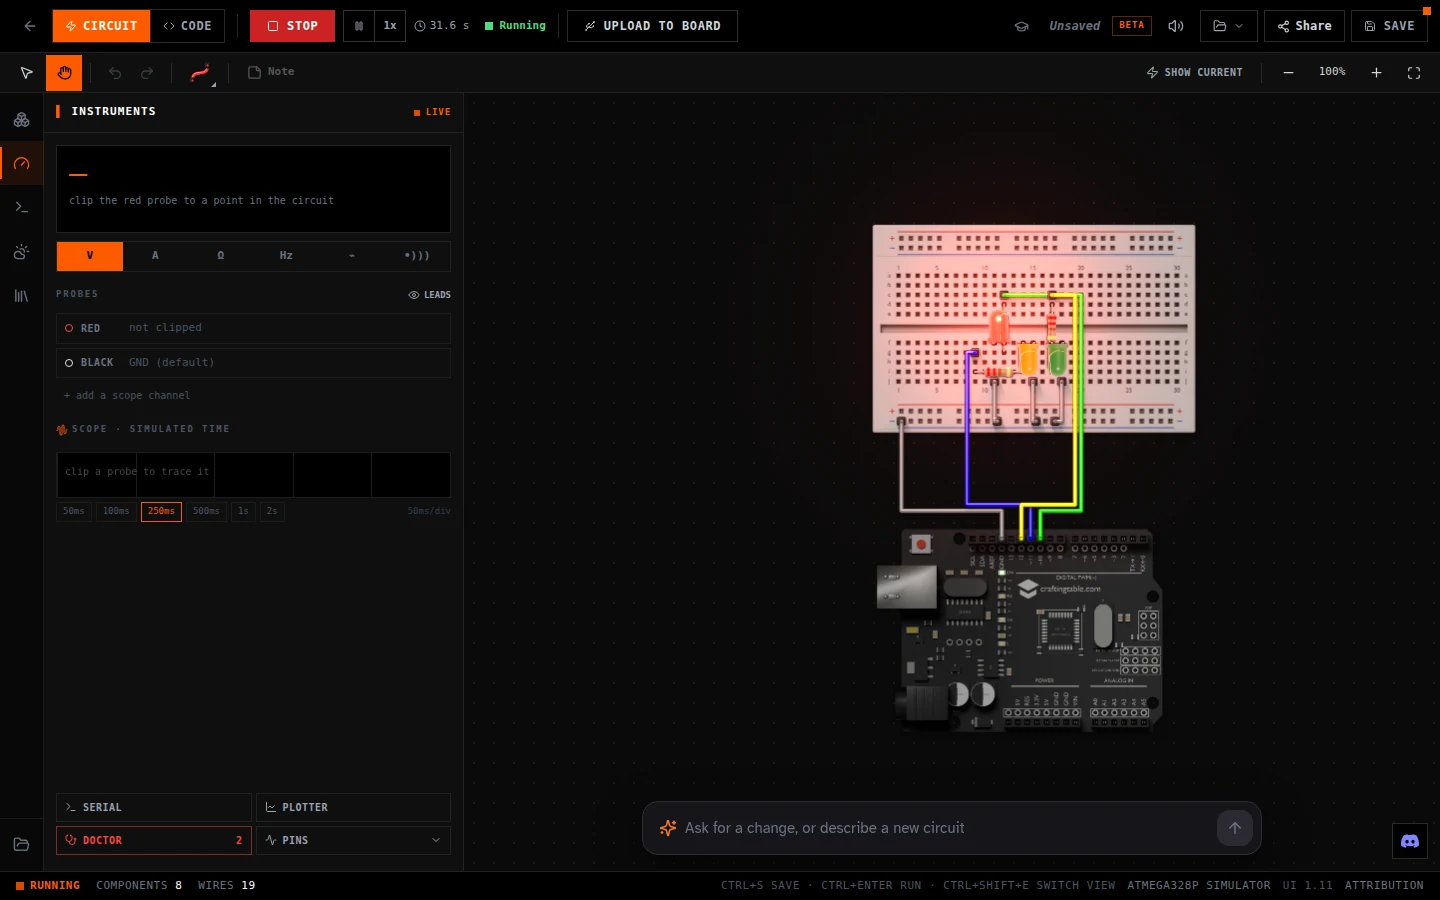
Arduino Uno simulator: run your sketch on a virtual HERO Board
Updated
Paste an Uno sketch, wire the parts on a breadboard, press Run, and watch it work. The board on screen is the HERO Board: Uno-compatible, with the same ATmega328P chip and the same pins, so Uno code and libraries run unchanged.
It isn't a lookalike. Your sketch is compiled the way the Arduino IDE compiles it and runs on an emulated ATmega328P at 16 MHz, so delay(1000) takes a second and analogRead() returns the number the circuit would really give.
Run a circuit now · Opens a traffic light on a HERO Board, already running. Free, on a computer or tablet.
Run it: A traffic light on the HERO Board · A real sketch on a simulated ATmega328P. Press Run, then open the code.
What's simulated
| Feature | In the simulator |
|---|---|
| Chip | ATmega328P at 16 MHz, emulated instruction by instruction |
| Program memory | 32 KB flash, 2 KB RAM, 1 KB EEPROM, as on the real chip |
| Digital pins | 14, with PWM (analogWrite()) on 3, 5, 6, 9, 10 and 11 |
| Analog inputs | A0 to A5, 0 to 1023 from the real voltage in the circuit |
| Timers and interrupts | millis(), delay(), attachInterrupt() and the hardware timers |
| Serial | Serial Monitor, typing back to the board, and a plotter |
| Buses | I2C and SPI, for screens and sensors |
| Sound | tone() measured on the pin and played through your speakers |
Around the board sit the parts from our kits: LEDs and RGB LEDs, resistors, buttons, the DIP switch, a 16-button keypad, a rotary encoder, a passive buzzer, a 128x64 OLED, a 4-digit display, a servo, a joystick and about two dozen sensor modules. 46 in all, and every one is a real part.
Libraries that work
Use #include the way you would in the IDE. These are proven to run in the simulator, not just to compile:
- Screens: U8g2 for the OLED, TM1637Display for the 4-digit display.
- Inputs: Keypad for the 16-button keypad, BasicEncoder for the rotary encoder.
- Motion: Servo.
- Sensors: the DHT sensor library for the KY-015, OneWire and DallasTemperature for the KY-001.
- Software: EEPROMEx, ArduinoJson, TaskScheduler, Time, and more.
Many more libraries compile. If one draws on a part the simulator doesn't have, the code still builds; there's just nothing on screen to show it.
Your first sketch
Open the simulator, choose the HERO Board, switch to Code and paste this. It blinks the LED built into pin 13 and prints to the Serial Monitor, with no wiring at all:
int count = 0;

void setup() {
  pinMode(13, OUTPUT);
  Serial.begin(9600);
}

void loop() {
  digitalWrite(13, HIGH);
  delay(500);
  digitalWrite(13, LOW);
  delay(500);
  count++;
  Serial.print("Blinks so far: ");
  Serial.println(count);
}Then add a part: drag an LED and a 220 ohm resistor onto the breadboard, wire them to pin 9, and fade it with analogWrite(). The PWM guide walks through it, and what resistor an LED needs explains the 220.
Tools a real bench has
- A multimeter. Clip the probes to any two points and read volts, amps, ohms or a logic level. It's the fastest way to see why an LED is dim.
- A scope. Trace a pin over time and watch PWM change its duty cycle, or a button bounce.
- A supply meter. See how much current the whole circuit draws from USB.
- A circuit doctor. It points at the wiring mistakes it can see, before you go hunting for them.
- Speed control. Run at 2x or 5x, or slow time down and step through it.
Ready-made circuits to open
- Traffic light: three LEDs on a timer, already running.
- 30 Days Lost in Space, Day 2: the course's first circuit, an LED and a resistor.
- 30 Days Lost in Space, Day 16: the 4-digit display showing numbers, a clock and words.
Each project guide runs in the same simulator: try the keypad door lock, the rotary encoder menu or the buzzer melody. Daily Quest adds a new circuit challenge on the HERO Board every day.
From the simulator to a real board
When the circuit works on screen, plug a HERO Board into your computer with its USB cable and press Upload to Board. The simulator sends the same compiled program to the real chip over Web Serial, in Chrome or Edge, on Windows, Mac or a Chromebook. No IDE to install, no account needed.
HERO Board and USB cable: The Uno-compatible board from the simulator, with its cable. Uno code, libraries and shields work on it.
30 Days Lost in Space: The HERO Board with the parts and filmed lessons that teach it, one sci-fi story from your first LED to a launch sequence.
Questions
Is this an Arduino Uno simulator?
It simulates the HERO Board, which is Uno-compatible: the same ATmega328P chip and the same pin layout. Any sketch written for an Uno runs on it unchanged.
Do I need to install anything or sign up?
No. It runs in your browser and you can build, run and upload without an account. A free account adds saving to your projects and sharing.
Can I use libraries?
Yes. About 100 libraries compile, and the common ones for screens, keypads, encoders, servos, LEDs and sensors are proven to run in the simulator.
Why can't I open it on my phone?
A breadboard, a board and a code editor don't fit on a phone screen, so phones get a page asking for a wider one. Tablets, laptops and desktops all work.