What you need to start learning electronics: the real shopping list
Updated
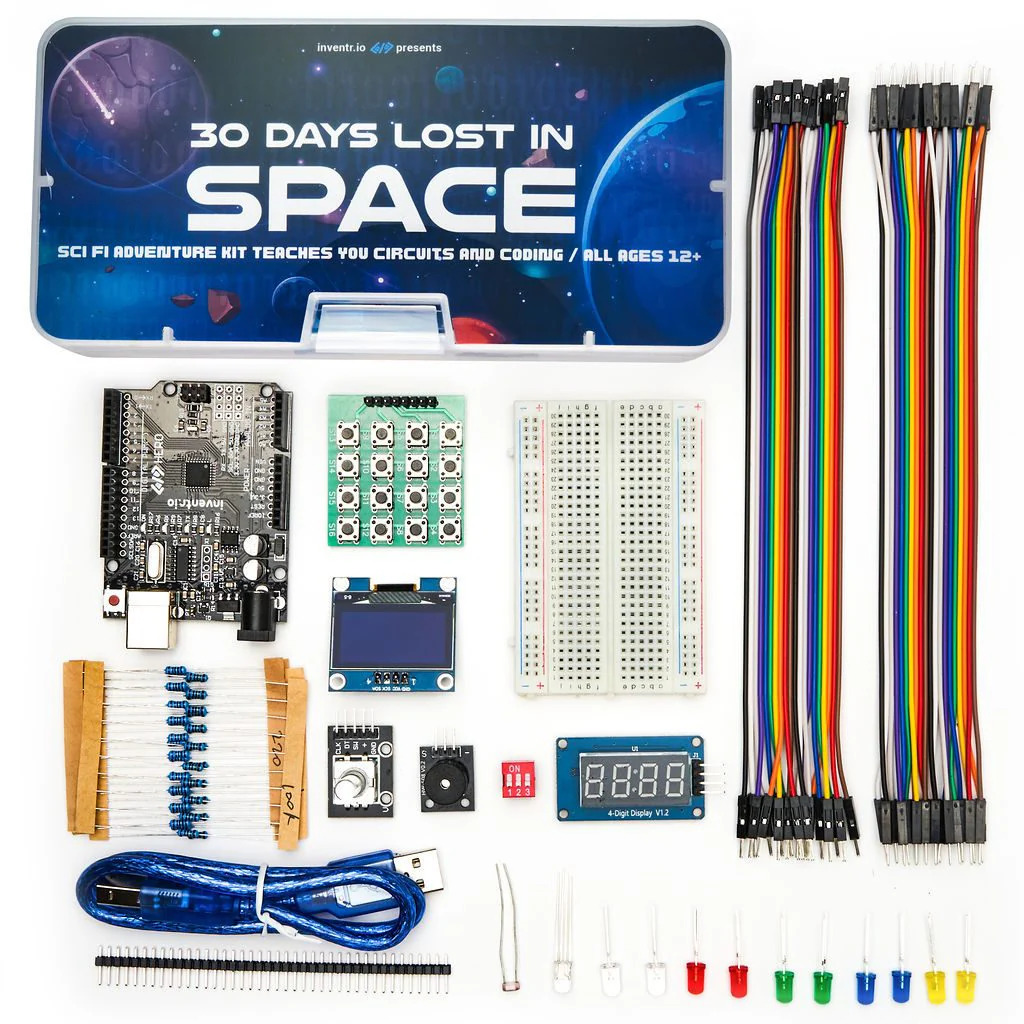
The list is shorter than most starter kits make it look. A board, a cable, a breadboard, wires, a few resistors, some LEDs, and one thing to press. Everything else can wait until a project asks for it.
Here is each item, why it's on the list, what to look for, and what our kits actually put in the box. Use it to buy the parts one at a time, or to check that a kit isn't padding its part count.
The short list
- A microcontroller board: an Uno-compatible board or a Raspberry Pi Pico WH.
- A USB cable that carries data, not just power.
- A solderless breadboard. Half size, 400 points, is plenty.
- Jumper wires: male-to-male, plus a few male-to-female for modules.
- Resistors in four values: 220 Ω, 1 kΩ, 10 kΩ and 100 kΩ.
- LEDs in a few colors, and one RGB LED.
- Something to press and something to sense: push buttons or a switch, and a photoresistor.
Add a computer to write the code on, and that's everything for the first stages of learning electronics at home: lights, switches and a sensor. Here's what to look for in each.
1. A microcontroller board
This is the part that runs your code. Two families cover almost every beginner:
- An Uno-compatible board, like the HERO Board: an ATmega328P chip, programmed in C++, with 5 V pins that suit most hobby parts. Most beginner tutorials and kits are written for this layout.
- A Raspberry Pi Pico W or WH, programmed in MicroPython, with 3.3 V pins and Wi-Fi. Get the WH: its pin headers come attached, so it plugs straight into a breadboard. The plain W arrives without them, and fitting them means soldering.
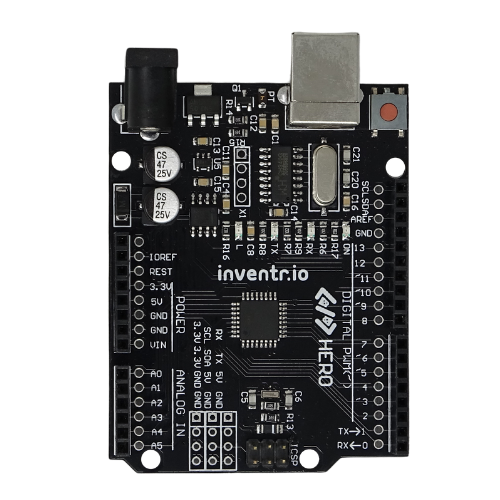
Not sure which? Uno-compatible or Pico compares the boards, and C++ or MicroPython compares the languages. Skip, for now, boards that run a full operating system, like the Raspberry Pi 4 or 5. They're small computers, not microcontrollers, and they make a first LED circuit harder, not easier.
2. A USB cable that carries data
This one catches more beginners than any part. Plenty of USB cables, especially the short ones that come with chargers and power banks, carry power and nothing else. The board's power light comes on, the computer never sees it, and the upload fails with no port to choose.
- The HERO Board uses a USB-B cable, the squarish plug printers use. One comes in the box with 30 Days Lost in Space and Cogsworth City, and with the board on its own.
- The Pico WH uses micro-USB. The Neon Realm kit doesn't include a cable, so check yours: one you've used to copy files to a phone is a safe bet.
If the board lights up and no port appears, swap the cable before you try anything else. Upload Failed or Port Not Found covers the rest.
3. A solderless breadboard
A breadboard holds parts and joins them without solder. Under the holes, metal strips connect each short row of five, and the long rails down the sides carry power and ground the length of the board. Push a leg in, pull it out, try again.
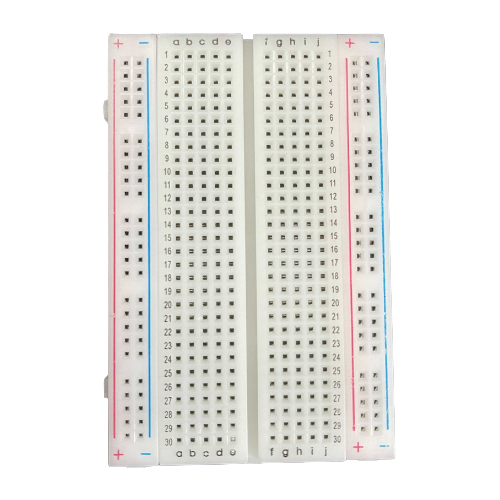
Half size, 400 points, is plenty while you learn: Cogsworth City and Neon Realm both ship a 400-point board. Breadboard Basics maps exactly which holes connect.
4. Jumper wires
Jumper wires carry signals between the board and the breadboard. Most of yours should be male-to-male, with a pin on both ends. Add a few male-to-female, with a socket on one end, for modules that have their own pins, like screens and keypads.
They often come as a rainbow ribbon you peel apart, and the 30 Days kit includes one ribbon of each kind. Color means nothing to the electricity, but a habit helps you read your own build: red for 5 V, black for ground, any other color for signals.
5. Resistors: four values cover nearly everything
Resistors limit current. You need them for every LED and for most inputs, and four values handle almost every beginner circuit:
| Value | What it's for |
|---|---|
| 220 Ω | In front of an LED, so it lights brightly without burning out |
| 1 kΩ | A dimmer LED, and a safe value to try when you're unsure |
| 10 kΩ | Pull-down resistors on buttons and switches, and the fixed half of a light-sensor circuit |
| 100 kΩ | Seeing Ohm's law at work: put it in front of an LED and almost nothing gets through |
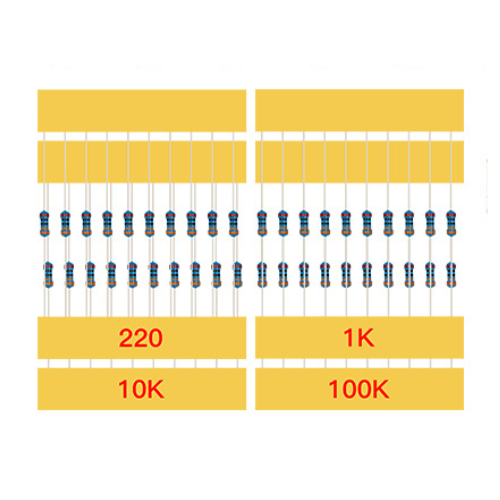
The 30 Days kit has 30 resistors across those four values, and Cogsworth City has 40. Quarter-watt parts are fine: nothing in a beginner circuit comes close to that rating. What resistor do I need for an LED? works out the 220 for every LED color, and reading resistor color codes tells the four apart once they're off the strip.
6. LEDs, and one RGB LED
LEDs are your first output and your best debugging tool: when you're not sure the code reached a line, light an LED there. Get a mix of colors, and one RGB LED, which holds red, green and blue in one bulb so your code can mix any color.
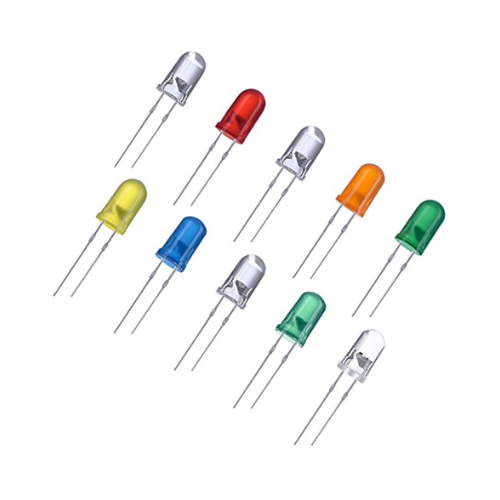
The 30 Days kit has 10 LEDs and an RGB LED. Cogsworth City has LEDs and an RGB LED too, and Neon Realm has LEDs in red, yellow and green.
7. Something to press, something to sense
A circuit that only lights up gets dull fast. Add one input you control and one that reads the world:
- Push buttons, the four-legged kind that sits across the breadboard's middle gap, or a DIP switch, a row of tiny on/off switches. Your code reads either as on or off.
- A photoresistor, a light sensor whose resistance falls as the light rises. Paired with a 10 kΩ resistor it gives your board a number that follows the brightness of the room, and it's the gentlest introduction to analog input there is.
Cogsworth City brings 6 push buttons with caps and 2 photoresistors. 30 Days has a photoresistor, and for inputs a 3-switch DIP switch, a 16-button keypad and a rotary encoder.
And a computer
You write the code on a laptop or desktop and send it down the USB cable. A tablet or phone can't do that part.
- For the HERO Board courses: Windows, Mac or a Chromebook, with Chrome or Edge. You upload to the board from the lesson page, and the desktop IDE works too.
- For the Pico WH (Neon Realm): Windows, macOS or Linux, for the Thonny editor. A Chromebook only works through ChromeOS's Linux environment, which many school-managed Chromebooks switch off.
Optional, once a project asks for it
- A passive buzzer for tones, tunes and alarms. See Passive Buzzer.
- Displays: a 4-digit display for numbers, an OLED screen for text and pictures.
- A keypad for passcodes and menus. See Keypad (4x4).
- A sensor kit when you want to measure more of the world. The 37-in-1 sensor kit guide covers every module.
- A multimeter. The first tool worth buying once circuits grow: it checks a resistor's value, a battery, or whether a wire really connects. The browser simulator has a meter built in to practice on.
- A 9 V battery connector, to run a finished HERO Board project away from the computer through its power jack. Cogsworth City includes one; the battery isn't included.
What you don't need
- A soldering iron. Every beginner build plugs into the breadboard, and none of our kits needs one.
- A bench power supply. The USB port powers the board and everything on the breadboard.
- An oscilloscope. A fine tool later. It won't help with your first circuits.
- A giant every-part kit with no lessons. Two hundred parts and no path is how a drawer fills up.
Parts one at a time, or a kit?
You can buy everything above separately, and each part is cheap. What costs you is the matching: the right resistor for the LED, a cable that carries data, a tutorial written for the exact parts in front of you. A kit's real value is that its parts and its lessons were made for each other. Here's what ours put in the box:
| 30 Days Lost in Space | Cogsworth City | Neon Realm | |
|---|---|---|---|
| Board | HERO Board | HERO Board | Raspberry Pi Pico WH |
| USB cable | Included | Included | Bring a micro-USB data cable |
| Breadboard | Half size | 400-hole | 400-point |
| Jumper wires | Two ribbons: male-to-male and female-to-male | 20 | Male-to-male |
| Resistors | 30, in 220, 1K, 10K and 100K | 40, in four values | Four values: 220, 1K, 10K, 100K |
| LEDs | 10, plus an RGB LED | LEDs and an RGB LED | Red, yellow and green |
| Inputs and sensors | DIP switch, 16-button keypad, rotary encoder, photoresistor | 6 push buttons, 2 photoresistors | Push buttons, photoresistors |
| Extras | OLED screen, 4-digit display, passive buzzer | 9 V battery connector | 9 V battery connector |
| Language | C++ | C++ | MicroPython |
From each kit's product page. None needs soldering, and each is one payment with no subscription.
Before you buy any of it, you can wire the whole list in the free browser simulator, with the HERO Board or the Pico, and see which way of working you enjoy.
30 Days Lost in Space: Everything on the list plus the optional parts: keypad, OLED screen, 4-digit display, buzzer and rotary encoder, with the HERO Board, its USB cable and 31 filmed lessons.
Python Starter Kit: Neon Realm: The list for a Pico WH: breadboard, LEDs, buttons with caps, photoresistors and resistors in four values, with 20 lessons in MicroPython. Bring a micro-USB data cable.
Questions
Do I need to solder to learn electronics?
No. Every beginner circuit plugs into a solderless breadboard. If you choose a Raspberry Pi Pico, get the WH, which has its pin headers already attached.
Will my phone charger cable work?
Only if it carries data. Many charger cables carry power alone: the board lights up but the computer can't see it. A cable you've used to copy files to a phone is a safe bet.
Which resistors should a beginner buy?
Four values cover almost every beginner circuit: 220 Ω for LEDs, 10 kΩ for pull-downs and light sensors, and 1 kΩ and 100 kΩ for dimmer LEDs and experiments. Quarter-watt parts are fine.
Do I need a multimeter to start?
No. It becomes useful once circuits grow, for checking resistor values and connections. The browser simulator has a meter you can practice with first.