KY-040 rotary encoder module: how it works, wiring and code
Updated
The KY-040 is a knob that never runs out of turn. Unlike a volume pot it has no end stops: it clicks as it turns, tells your code which way each click went, and pushes in like a button. That makes it the control behind menus, counters, and the depth dial that brings the ship to the surface in 30 Days Lost in Space.
Here's how two switches inside it encode direction, which pin goes where on the HERO Board, the SensorKit course's code explained line by line, and the point where you should stop polling it and let interrupts do the counting.
Two switches, a moment apart
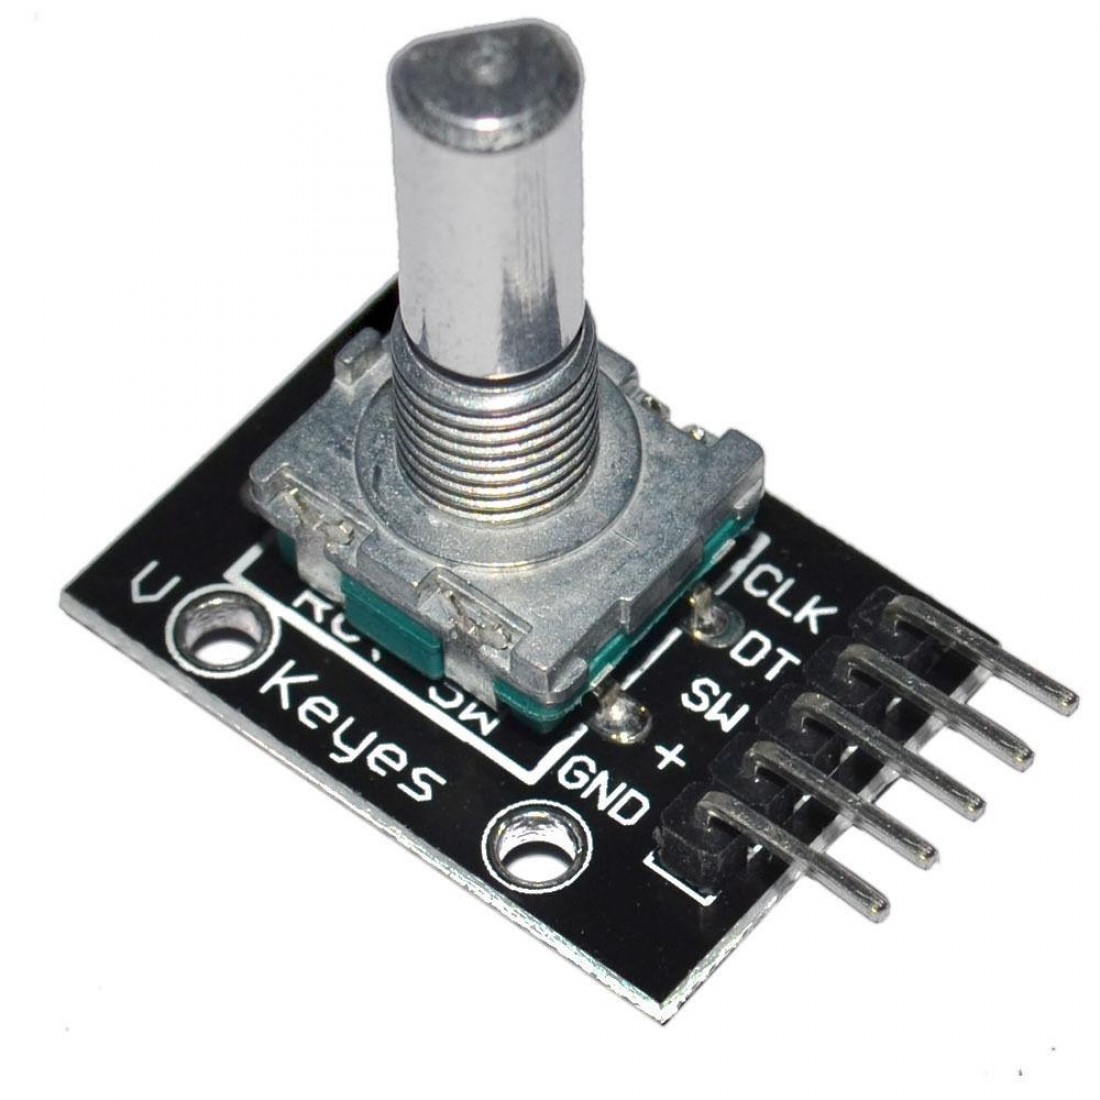
Inside the metal body is a notched wheel with two contacts brushing against it. They're set slightly apart, so as the shaft turns they open and close one after the other, a moment apart. Those two signals come out on CLK and DT, and each click you feel is one round of that pattern.
The direction is in the order. Turn one way and CLK changes before DT; turn the other way and DT leads. So at the instant CLK changes, DT tells you which way the knob went. That scheme is called quadrature encoding, and it's the same idea inside a mouse's scroll wheel. The rotary encoder article in the Help Center draws the two waveforms side by side.
The other three pins: SW is the push switch, which joins SW to ground when you press the knob in, and + and GND power the module. The board pulls CLK and DT up to + with its own resistors, which is why the lesson reads them as plain inputs, and why + has to be connected even though the knob seems to need no power.
Wiring
| KY-040 pin | HERO Board pin | What it carries |
|---|---|---|
| CLK | D2 | The first switch: its change marks a click |
| DT | D3 | The second switch: read with CLK for direction |
| SW | D4 | The push switch: LOW while pressed |
| + | 5V | Power, and the pull-ups on CLK and DT |
| GND | GND | Ground |
From the SensorKit lesson's code and walkthrough.
The lesson's code checks the pins over and over (polling), so today any pins would do. CLK and DT go on 2 and 3 anyway, because those are the HERO Board's only interrupt pins, and the day you add a screen you'll want interrupts. The walkthrough's warning is worth repeating, too: + to 5V and GND to ground, never the other way round, or you'll short something.
The code, line by line
#define CLK 2
#define DT 3
#define SW 4

int counter = 0;
int currentStateCLK;
int lastStateCLK;
String currentDir = "";
unsigned long lastButtonPress = 0;

void setup() {
  pinMode(CLK, INPUT);
  pinMode(DT, INPUT);
  pinMode(SW, INPUT_PULLUP);
  Serial.begin(9600);
  lastStateCLK = digitalRead(CLK);   // where CLK starts
}

void loop() {
  currentStateCLK = digitalRead(CLK);

  // CLK changed: a click. React to one edge only, to avoid counting it twice.
  if (currentStateCLK != lastStateCLK && currentStateCLK == 1) {
    // DT different from CLK: turning counter-clockwise
    if (digitalRead(DT) != currentStateCLK) {
      counter--;
      currentDir = "CCW";
    } else {
      // otherwise clockwise
      counter++;
      currentDir = "CW";
    }
    Serial.print("Direction: ");
    Serial.print(currentDir);
    Serial.print(" | Counter: ");
    Serial.println(counter);
  }
  lastStateCLK = currentStateCLK;   // remember for next time

  int btnState = digitalRead(SW);
  if (btnState == LOW) {   // the knob is pressed in
    // more than 50 ms since the last LOW reading: a new press
    if (millis() - lastButtonPress > 50) {
      Serial.println("Button pressed!");
    }
    lastButtonPress = millis();
  }

  delay(1);   // a slight delay to help debounce
}lastStateCLKremembers CLK from the previous pass. When the two differ, the knob has moved.currentStateCLK == 1keeps only the rising edge. CLK falls and rises within each click, and counting both edges would add two per click.- At that edge, DT gives the direction: different from CLK means counter-clockwise, the same means clockwise. If your count runs backwards, swap the CLK and DT wires, or the two numbers at the top.
- The button prints once per press, not once per loop. While you hold the knob in, every pass refreshes
lastButtonPress, so the 50 ms gap only appears after you let go. That doubles as debouncing. - Open the Serial Monitor at 9600 baud and turn: every click prints its direction and the running count, as in the walkthrough.
When polling stops being enough
That sketch catches every click because its loop has almost nothing else to do. Give the loop real work, such as redrawing a screen, and a click that comes and goes while the screen is busy is simply missed: the count drifts. The cure is an interrupt. The chip drops what it's doing the instant CLK changes, counts the click, and carries on. This is the encoder half of the menu example verified in the CraftingTable simulator:
const int CLK_PIN = 2;   // pin 2 can trigger an interrupt
const int DT_PIN = 3;

volatile int clicks = 0;   // changed inside the interrupt, so volatile
int position = 0;

void onClick() {   // runs the moment CLK falls: one click of the knob
  if (digitalRead(DT_PIN) == HIGH) clicks++;
  else clicks--;
}

void setup() {
  pinMode(CLK_PIN, INPUT_PULLUP);
  pinMode(DT_PIN, INPUT_PULLUP);
  attachInterrupt(digitalPinToInterrupt(CLK_PIN), onClick, FALLING);
  Serial.begin(9600);
}

void loop() {
  noInterrupts();   // take the clicks counted so far, without the interrupt changing them halfway
  int turned = clicks;
  clicks = 0;
  interrupts();
  if (turned != 0) {
    position += turned;
    Serial.println(position);
  }
}volatile tells the compiler that clicks can change at any moment, behind the loop's back. Copying it with interrupts paused means the loop never reads a value the interrupt is halfway through changing. 30 Days Lost in Space takes this one step further with the BasicEncoder library, which also handles contact bounce: see the BasicEncoder article.
What people build with it
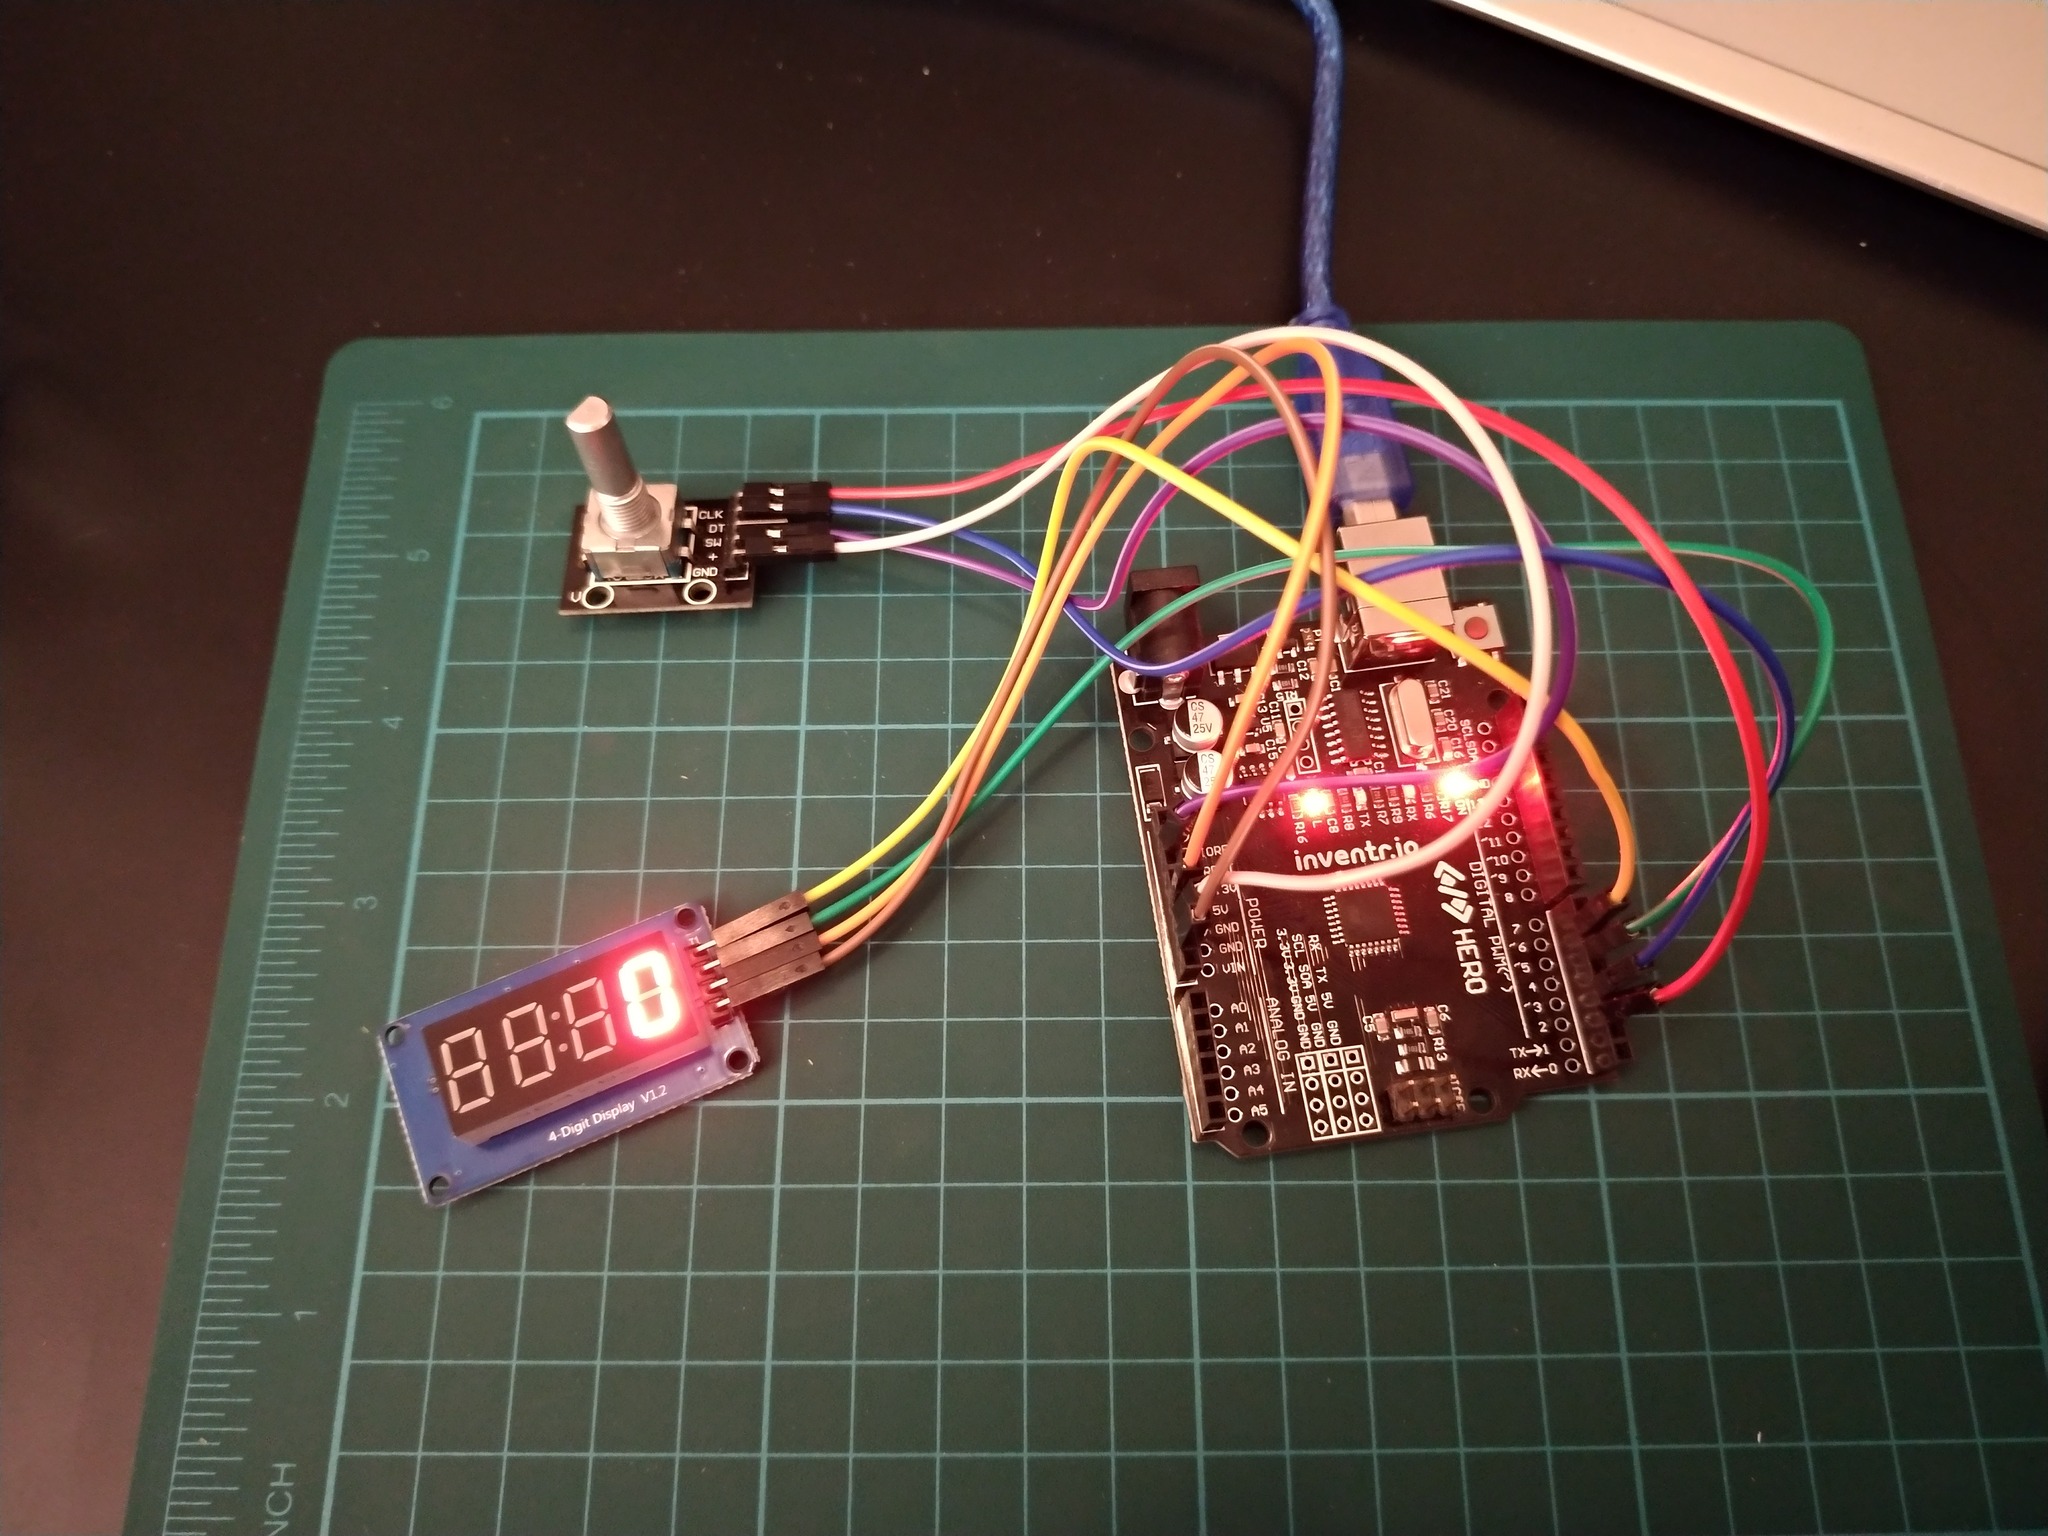
- A depth dial. In Day 18 and Day 19 of 30 Days Lost in Space, each click of the encoder pilots the ship up one meter toward the surface, with the depth on a 4-digit display.
- A menu. The encoder menu example moves a marker through a list on an OLED screen as you turn, and picks an item when you press the knob in.
- A countdown timer. Turn to set the seconds, press to start, and a buzzer beeps at zero: another example verified in the simulator.
When it doesn't work
- Clicks go missing when you turn fast, or the count drifts. The loop is busy elsewhere. Count in an interrupt on D2 and D3.
- It counts backwards. Swap the CLK and DT wires, or their numbers in the code.
- Two counts per click, or one every other click. Encoders differ in how many signal changes they make per click. Count one edge or both to match yours.
- The count wanders when nobody is touching it. + or GND is loose, so CLK and DT have nothing holding them up.
- The button prints nothing. SW isn't on the pin your code reads, or the code reads it without
INPUT_PULLUP.
The rotary encoder is a part in the free browser simulator, with CLK, DT and SW, so the interrupt sketch runs there before you wire anything. Watch the real module in the KY-040 walkthrough. For the other knob-like input in the case, see the KY-023 joystick, and for everything else, the 37-in-1 sensor kit guide.
37-in-1 Sensor Kit: The KY-040 and 36 more modules in a latching case, with the free SensorKit course: 31 filmed walkthroughs and their code.
30 Days Lost in Space: The HERO Board, a rotary encoder and a 4-digit display among the parts, with the filmed lessons that build the depth dial.
Questions
What's the difference between a rotary encoder and a potentiometer?
A potentiometer reports an absolute position between two end stops. A rotary encoder turns forever and reports movement: one click at a time, with a direction. Your code keeps the count.
What do CLK and DT mean on the KY-040?
They're the encoder's two switch outputs. They change a moment apart as you turn, and which one changes first tells you the direction. CLK is usually the one you watch for a click, and DT the one you read for direction.
How many clicks does the KY-040 make per turn?
The encoder module in 30 Days Lost in Space clicks 20 times per full turn, 18 degrees per click. To check yours, run the SensorKit sketch, turn the knob exactly once around, and read the count.
Do I need interrupts for a rotary encoder?
Not for a simple counter like the SensorKit sketch. Once your loop does slower work, such as updating a display, use interrupts on D2 and D3 (the HERO Board's interrupt pins) so no click is missed.