Build a countdown timer with a knob and a 4-digit display
Updated
A countdown timer needs three things most first projects don't have: an input you can set, a display that changes while you wait, and a clock that keeps time without freezing the rest of the program. Build this one and you have all three.
Turn the knob to set the seconds, press it to start, and the 4-digit display counts down to zero, where the buzzer beeps. First comes a short warm-up that makes the knob count, then the timer itself. Both passed their tests in our simulator.
What you'll build and learn
- The TM1637 display: four digits driven on just two wires. See the 7-segment display and the TM1637 library.
- Reading a rotary encoder by watching for its CLK pin to fall: rotary encoder.
- millis() timing, the way to count seconds while the loop keeps running: millis().
- A program with two states, setting and running: state machines.
- A beep at zero with tone().
Run it: The countdown timer, running · The finished build in the CraftingTable simulator: the same parts, wiring and code as this page.
Parts
| Part | How many | Notes |
|---|---|---|
| HERO Board | 1 | Uno-compatible, ATmega328P |
| 4-digit display, TM1637 | 1 | 4 pins: CLK, DIO, VCC, GND |
| Rotary encoder module | 1 | 5 pins: CLK, DT, SW, +, GND |
| Passive buzzer | 1 | Pins marked S and minus |
| Breadboard | 1 | For the shared 5V and GND rails |
| Jumper wires | 13 |
All four parts come in 30 Days Lost in Space, where the encoder and the display first work together on Day 18: one click of the knob is one meter of depth on the gauge.
Wiring
| Part pin | Goes to | Notes |
|---|---|---|
| HERO Board 5V | Breadboard 5V rail | |
| HERO Board GND | Breadboard GND rail | |
| Encoder CLK | D2 | |
| Encoder DT | D3 | |
| Encoder SW | D4 | Push to start |
| Encoder + | 5V rail | |
| Encoder GND | GND rail | |
| Display CLK | D6 | Not the encoder's CLK: each part has its own |
| Display DIO | D5 | |
| Display VCC | 5V rail | |
| Display GND | GND rail | |
| Buzzer S | D8 | |
| Buzzer minus | GND rail | Leave the middle pin empty |
The display on D6 and D5 and the encoder on D2 and D3 are the same pins the 30 Days lessons use.
Step 1: make the knob count
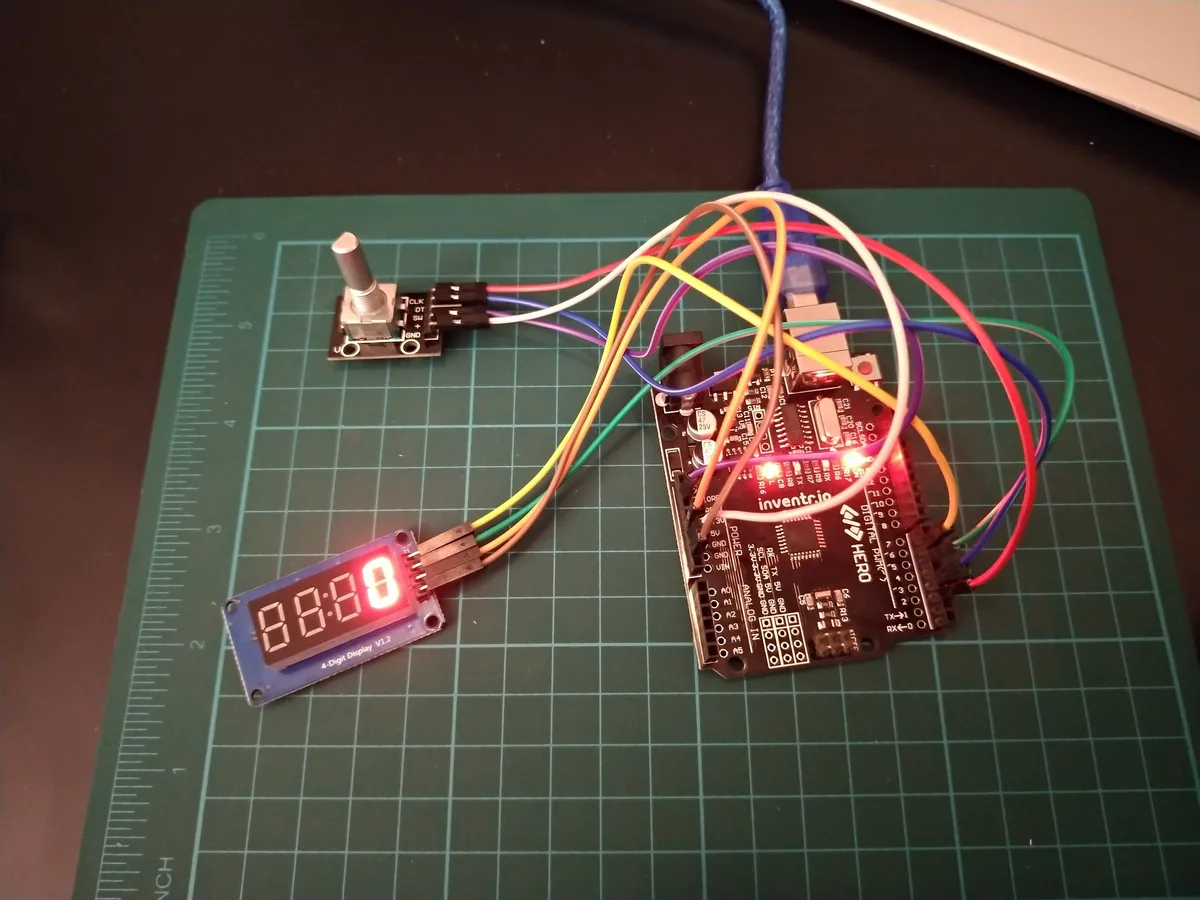
Before the timer, check the knob and the display with this short sketch. Install the TM1637 library by Avishay Orpaz from the Library Manager in the Arduino IDE, upload, and turn the knob: the number follows, up one way and down the other. The buzzer can stay wired; this sketch doesn't use it.
// Knob counter: turn the rotary encoder and the 4-digit display counts up or down.
#include <TM1637Display.h>

const int CLK_PIN = 2;   // encoder
const int DT_PIN = 3;
TM1637Display display(6, 5);   // display CLK on 6, DIO on 5

int count = 0;
int lastClk = HIGH;

void setup() {
  pinMode(CLK_PIN, INPUT_PULLUP);
  pinMode(DT_PIN, INPUT_PULLUP);
  Serial.begin(9600);
  display.setBrightness(5);
  display.showNumberDec(count);
}

void loop() {
  int clk = digitalRead(CLK_PIN);
  if (clk != lastClk && clk == LOW) {   // one click: CLK falls
    if (digitalRead(DT_PIN) != clk) count++;
    else count--;
    display.showNumberDec(count);
    Serial.print("count ");
    Serial.println(count);
  }
  lastClk = clk;
}It reads the encoder without an interrupt. On every pass of loop() it checks CLK; when CLK has just fallen from HIGH to LOW, that's one click, and DT tells the direction. showNumberDec() puts the number on the display, right-aligned. This works because the loop does almost nothing else, so it comes round fast enough to catch every click.
Step 2: the countdown timer
// Countdown timer: turn the knob to set the seconds, press it to start. At zero the buzzer beeps.
#include <TM1637Display.h>

const int CLK_PIN = 2;   // encoder
const int DT_PIN = 3;
const int SW_PIN = 4;
const int BUZZER_PIN = 8;
TM1637Display display(6, 5);

int seconds = 0;
bool running = false;
unsigned long lastTick = 0;
int lastClk = HIGH;
int lastSw = HIGH;

void setup() {
  pinMode(CLK_PIN, INPUT_PULLUP);
  pinMode(DT_PIN, INPUT_PULLUP);
  pinMode(SW_PIN, INPUT_PULLUP);
  Serial.begin(9600);
  display.setBrightness(5);
  display.showNumberDec(seconds);
}

void loop() {
  int clk = digitalRead(CLK_PIN);
  if (!running && clk != lastClk && clk == LOW) {   // set the time while stopped
    if (digitalRead(DT_PIN) != clk) seconds++;
    else if (seconds > 0) seconds--;
    display.showNumberDec(seconds);
  }
  lastClk = clk;

  int sw = digitalRead(SW_PIN);
  if (sw == LOW && lastSw == HIGH && seconds > 0) {   // press to start
    running = true;
    lastTick = millis();
    Serial.print("Start ");
    Serial.println(seconds);
  }
  lastSw = sw;

  if (running && millis() - lastTick >= 1000) {   // a second has passed
    lastTick += 1000;
    seconds--;
    display.showNumberDec(seconds);
    if (seconds == 0) {
      running = false;
      tone(BUZZER_PIN, 1000, 500);
      Serial.println("Done");
    }
  }
}How the timer works
Two states
running is the whole state machine. While it's false, the knob sets seconds, never below 0, and the display shows it. A press, when there's something to count, sets running to true and notes the time. While it's true, the knob is ignored and the clock counts down.
Counting without stopping
millis() is the number of milliseconds since the board started. millis() - lastTick >= 1000 asks one question: has a second passed since the last tick? Nothing waits, so the loop keeps reading the knob and the button thousands of times a second. When a second has passed, lastTick += 1000 moves the mark on by exactly one second. Setting it to millis() instead would add a few milliseconds of lateness to every tick, and over a long countdown the timer would drift slow.
The press and the beep
SW reads LOW while pressed, thanks to INPUT_PULLUP. The sketch acts when it sees LOW now and HIGH last time, which is the moment of the press. At zero, the timer stops, tone(BUZZER_PIN, 1000, 500) beeps at 1,000 Hz for half a second, and Serial prints Done.
Try it without parts
The encoder, the TM1637 display and the buzzer are all parts in the free browser simulator. Wire them as in the table, paste either sketch and press Run. Set a few seconds with the on-screen knob, press it, and you'll see the countdown and hear the beep.
Make it yours
Show minutes and seconds
Add this function above loop() and use showTime(seconds); wherever the sketch calls display.showNumberDec(seconds);. A 90-second timer then reads 01:30 with the colon lit.
void showTime(int s) {
  // 90 seconds shows as 01:30
  display.showNumberDecEx((s / 60) * 100 + s % 60, 0b01000000, true);
}- Press to pause. Let a press while running set
runningback tofalse; the knob then adjusts what's left, and the next press carries on. - Spell it out. At zero, show dOnE with
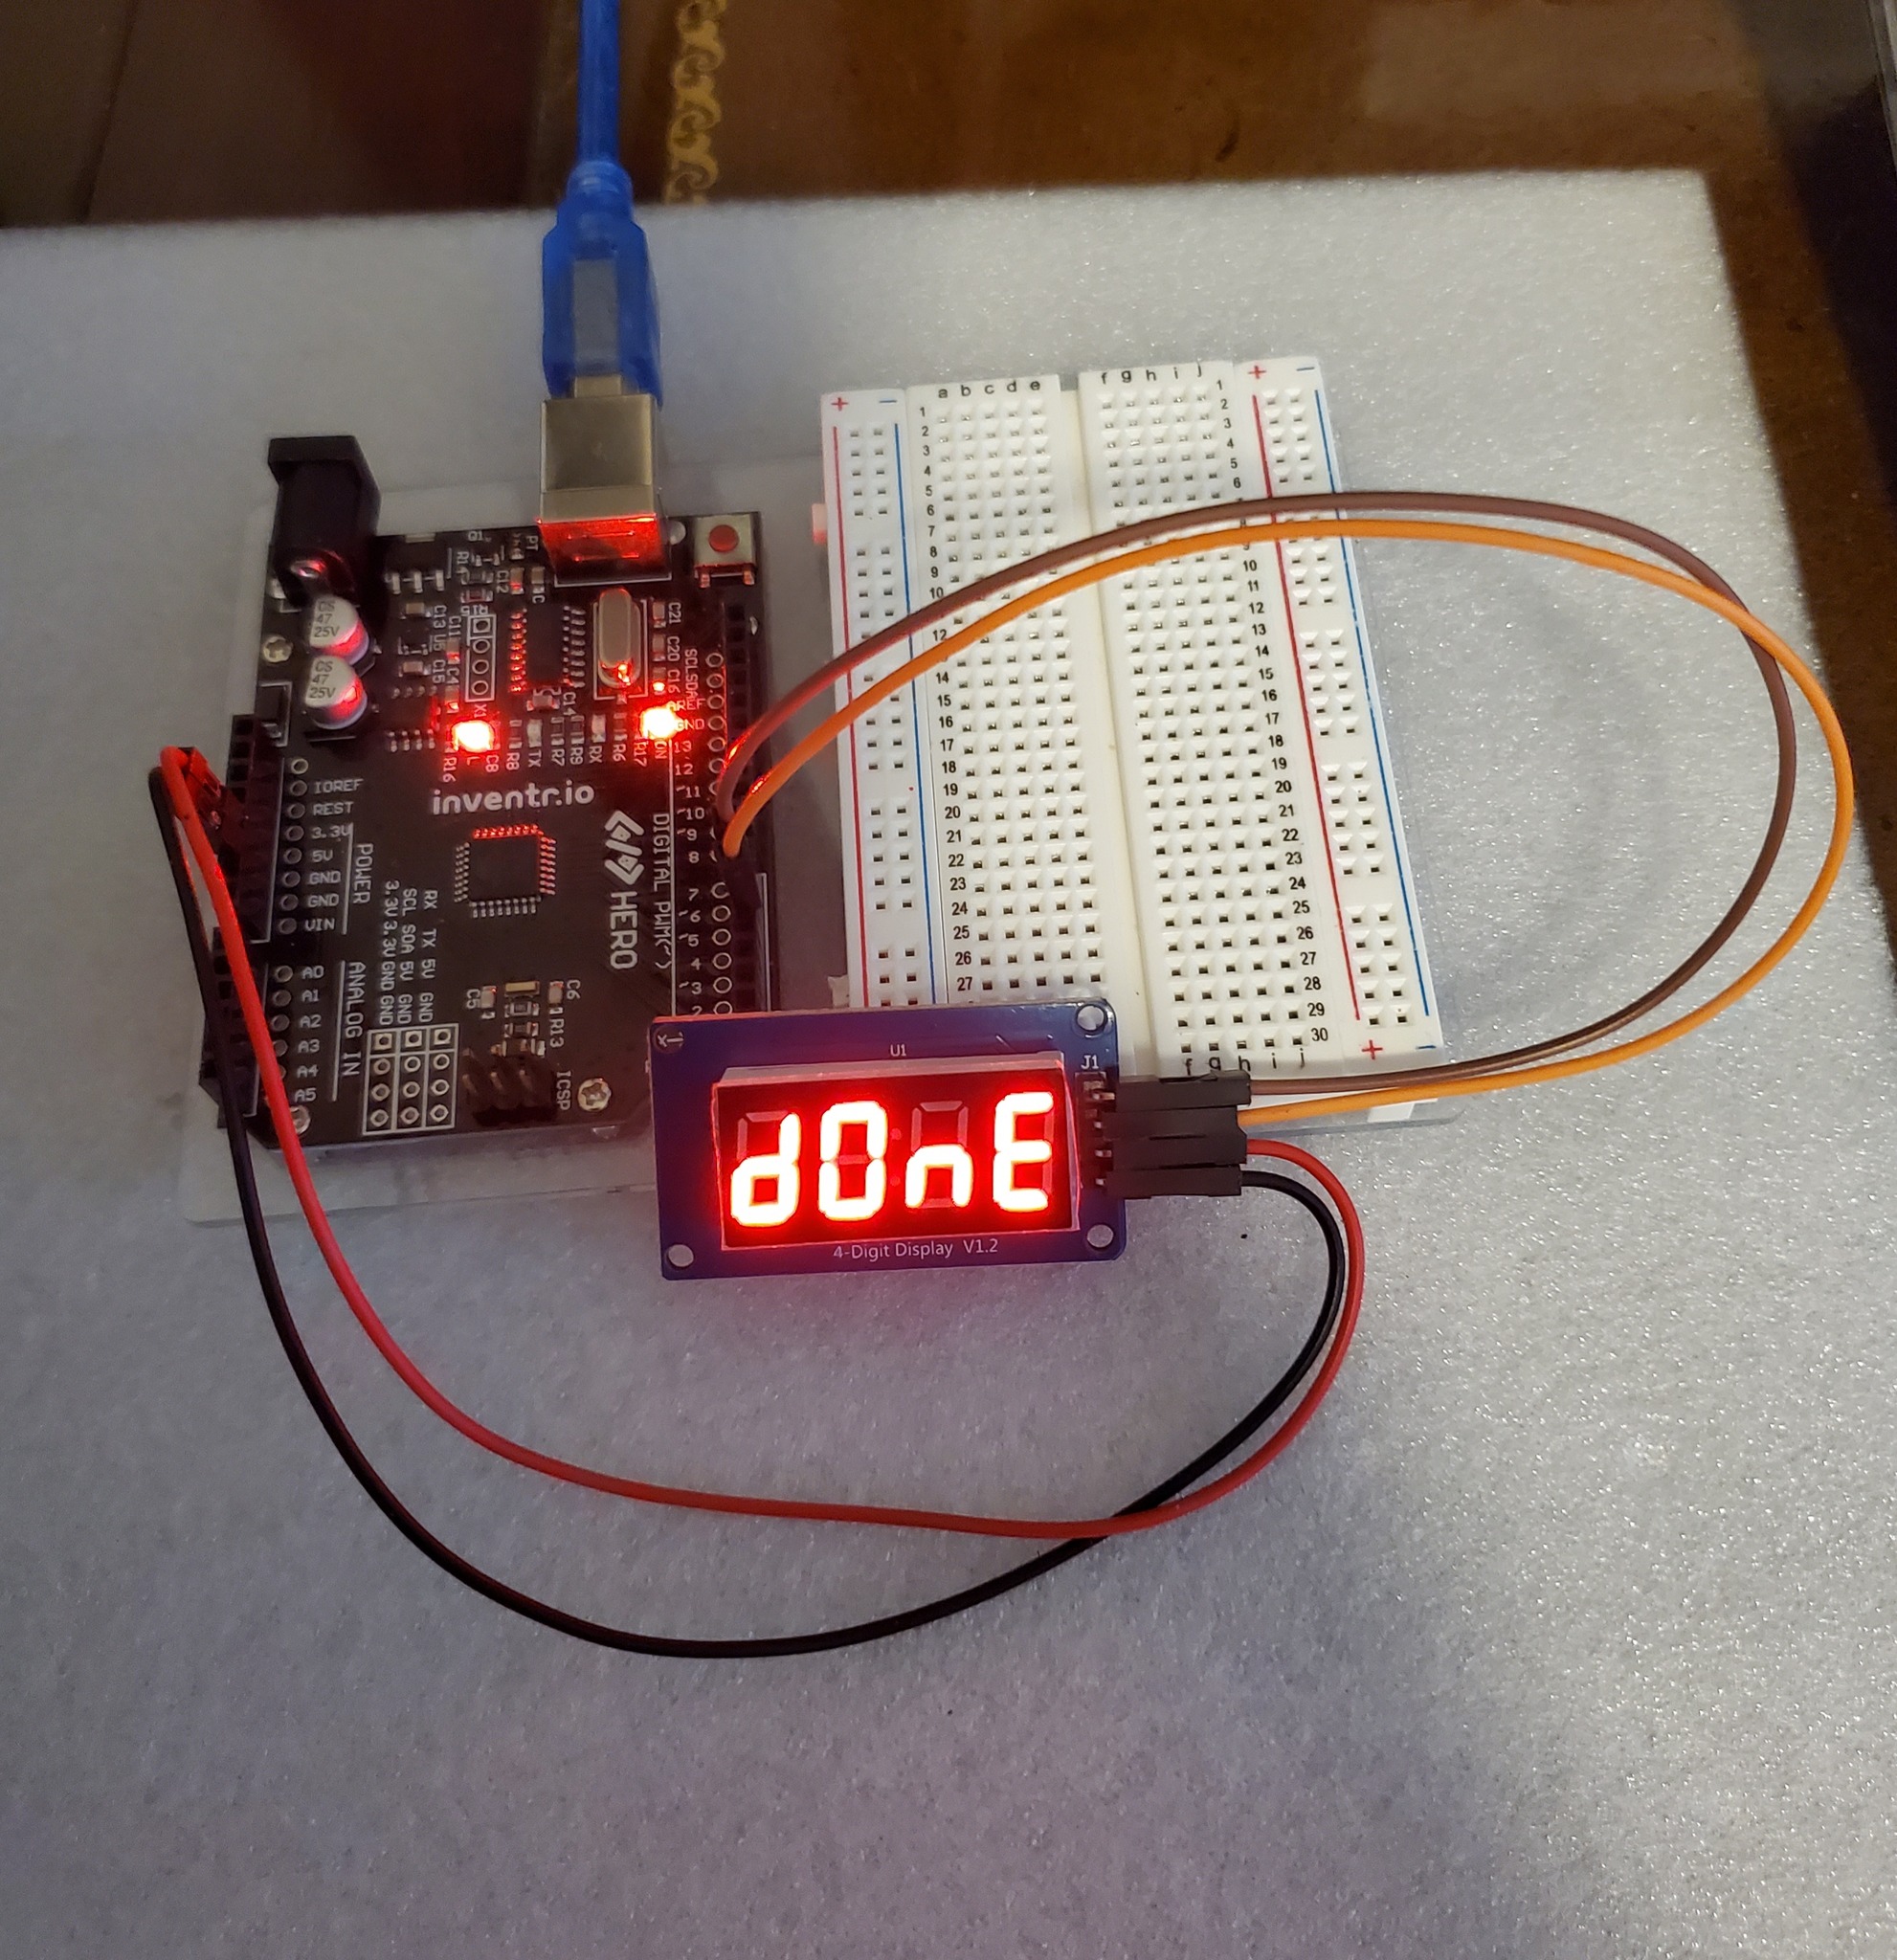
setSegments(), as the TM1637 article shows and the photo at the top of this page does. - A bigger ending. Play three beeps, or a short tune from the buzzer melody build.
Common problems
- The display stays dark. Its CLK and DIO are swapped, the most common TM1637 mistake: CLK goes to D6, DIO to D5. Then check VCC and GND. More in 7-segment display shows nothing.
- The count goes the wrong way. The encoder's CLK and DT are swapped at the board.
- It skips clicks, or counts two at once. Push the encoder's jumpers firmly onto its pins and turn slowly. A fast spin can outrun a loop that checks the pin; the encoder menu shows the interrupt version.
- Pressing doesn't start it. The time is 0 (a press only starts a count above 0), or SW isn't on D4.
- No beep at zero. The buzzer's S pin isn't on D8, its minus pin isn't on GND, or it's an active buzzer, which won't follow
tone().
30 Days Lost in Space: The HERO Board, the rotary encoder, the 4-digit display and the buzzer, with filmed lessons that use them for a depth gauge and a launch countdown.
Questions
Why not use delay(1000) for a countdown?
delay() stops the board completely, so it can't read the knob or the button while it waits. millis() lets the loop check whether a second has passed and keep doing everything else in between.
How do I show minutes and seconds on a TM1637 display?
Turn the seconds into a four-digit number, minutes times 100 plus the remaining seconds, and show it with showNumberDecEx(number, 0b01000000, true). The 0b01000000 lights the colon, and true keeps the leading zero.
What's the longest countdown it can show?
As written, 9,999 seconds, because the display has four digits and shows only the last four of a longer number. With minutes and seconds, 99:59.
Does the timer drift?
Not from the code: lastTick += 1000 keeps every second exactly a second after the last by the board's own clock. For a clock that must stay right for days, use a real-time clock module; Pandora's Box includes a DS3231.