KY-017 mercury tilt switch module: how it works, wiring and code
Updated
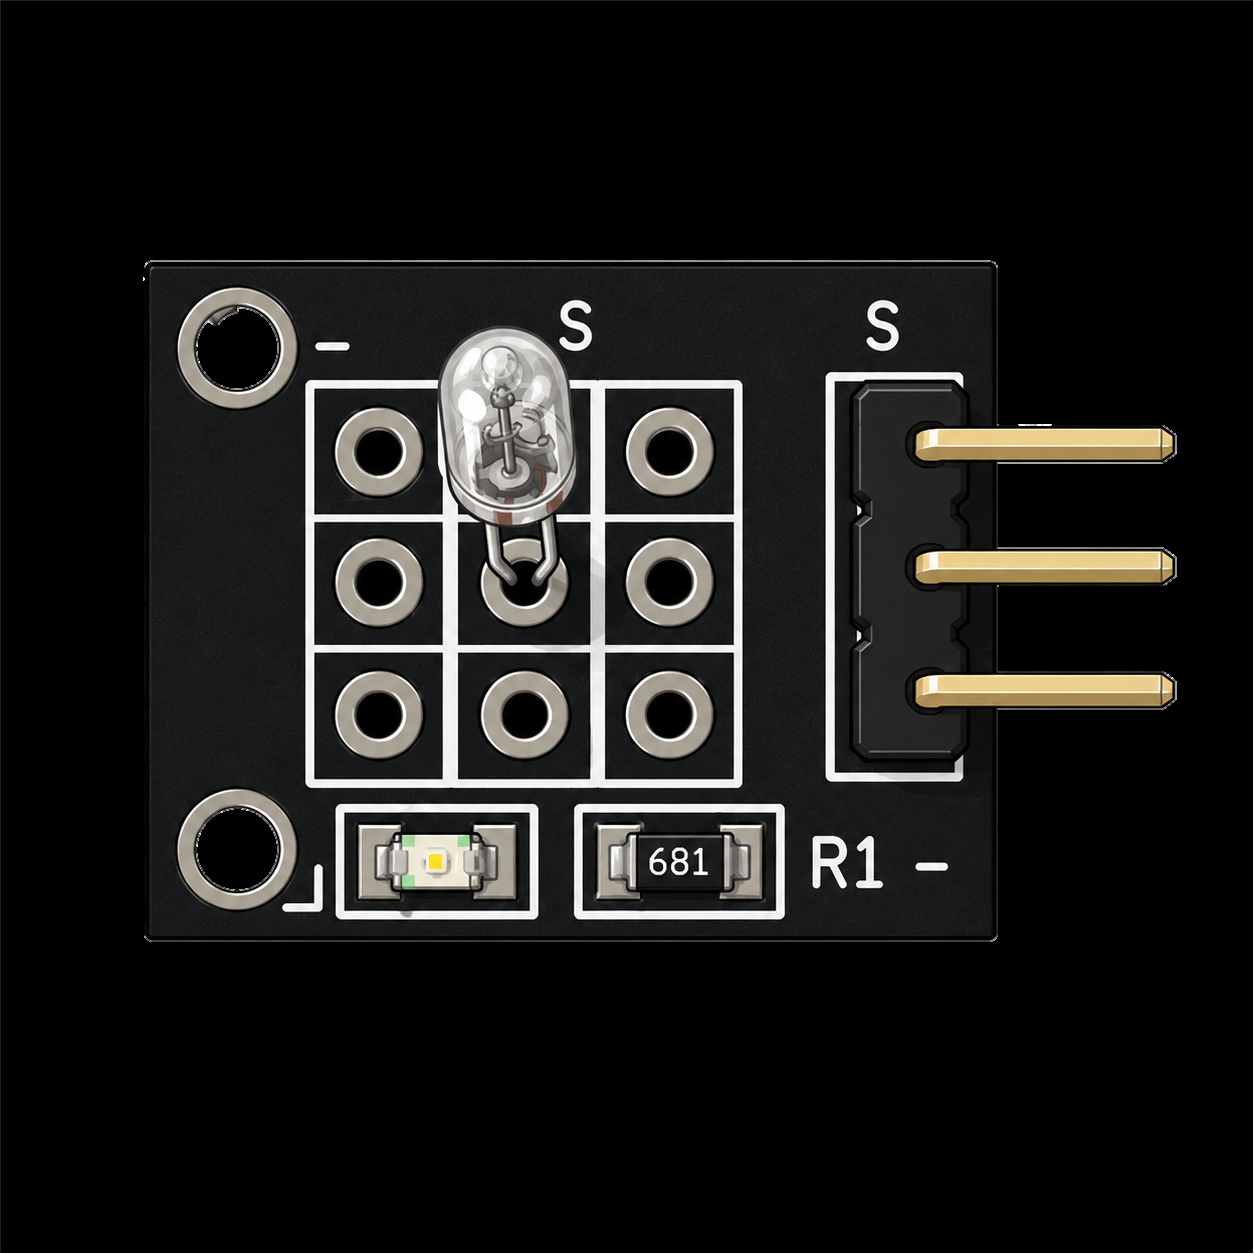
Inside the little glass bulb on the KY-017 is a bead of mercury, the metal that's liquid at room temperature. Tip the board one way and the bead rolls onto two wires sealed into the end of the bulb, joining them. Tip it back and the bead rolls off.
That makes it a switch gravity presses for you. It can't tell you an angle, only which side of level the bulb is on, but it does that one job cleanly and silently.
How a mercury switch works
Mercury conducts electricity, and its surface tension holds it together in one round drop. With the contact end of the bulb pointing down, the drop sits across both contacts and the switch is closed. Tilt the bulb past level and the drop slides away to the other end, breaking the circuit. Because the drop moves as one blob and wets the contacts, it makes a cleaner connection than a rattling metal ball, which is the main difference from the KY-020 ball switch.
The board adds a resistor, a small LED and three pins: S for signal, + in the middle and − for ground. In the walkthrough, the module's own LED comes on as the bead makes contact, so you can see the switch working before your code does anything with it.
Handle it with care
Mercury is toxic. Sealed in its glass it's harmless, but the glass is thin. Don't drop the module on a hard floor, don't push it into the breadboard by the bulb, and keep it away from small children. If the bulb ever cracks, don't touch the bead and don't vacuum it up. Your local council or recycling center can tell you how to get rid of it safely. If you'd rather not have glass and mercury on the bench at all, the KY-020 does the same job with a metal ball.
Wiring
| Module pin | HERO Board pin | What it carries |
|---|---|---|
| S | 3 | The signal |
| + (middle) | 5V | Power |
| − | GND | Ground |
Pin 3 matches the course sketch. The walkthrough finds it by counting along the header: 0, 1, 2, 3.
The code from the course
The course sketch copies the switch onto the board's L LED, with no delay, so the LED follows the bulb the instant it tips.
int ledPin = 13;   // the board's L LED
int tiltPin = 3;   // the module's S pin
int val;

void setup() {
  pinMode(ledPin, OUTPUT);
  pinMode(tiltPin, INPUT);
}

void loop() {
  val = digitalRead(tiltPin);
  if (val == HIGH) {
    digitalWrite(ledPin, HIGH);
  } else {
    digitalWrite(ledPin, LOW);
  }
}Which way up reads HIGH depends on how the module is mounted, because it's the bulb's angle that decides. Before you build it into anything, hold it in the position you care about, print digitalRead(3) in the Serial Monitor, and note which value means 'tipped'. Then write your if around that.
Make it ignore a wobble
A tilt switch answers instantly, so a nudge that rocks the board can flip the reading for a moment. If you want 'it fell over' rather than 'it wobbled', only believe a new reading once it has held for a short time:
const int tiltPin = 3;
const unsigned long holdMs = 300;   // how long a change must last

int lastReading;
int steadyState;
unsigned long changedAt = 0;

void setup() {
  pinMode(tiltPin, INPUT);
  pinMode(LED_BUILTIN, OUTPUT);
  lastReading = digitalRead(tiltPin);
  steadyState = lastReading;
  digitalWrite(LED_BUILTIN, steadyState);
}

void loop() {
  int reading = digitalRead(tiltPin);
  if (reading != lastReading) {     // it moved: start timing again
    changedAt = millis();
    lastReading = reading;
  }
  if (reading != steadyState && millis() - changedAt > holdMs) {
    steadyState = reading;          // it stayed put long enough
    digitalWrite(LED_BUILTIN, steadyState);
  }
}It's the same pattern as button debouncing, with a longer wait, because a board that's tipping settles far more slowly than a button's contacts. Raise holdMs to ignore bigger knocks; lower it for a quicker response.
Mercury tilt switch or ball switch?
The KY-020 does the same job with a metal ball in a small sealed case. In the course walkthroughs the difference shows straight away: the ball switch needs a firmer tip, or a bit of a shake, before it changes, and the ball can rattle on its contacts where the mercury bead settles cleanly. Use the KY-017 where it can stay put and be treated gently. Use the KY-020 in anything that gets carried, dropped or thrown in a bag.
Neither one measures an angle; for that you need an accelerometer. And if the question is whether something was bumped rather than which way up it is, the spring sensors fit better: the KY-002 shock sensor and the KY-031 tap sensor.
What to build with it
- A tip-over alarm. Stand it upright on a shelf or inside a box. If it goes over, sound a buzzer.
- A which-way-up indicator. Light a green LED while a box is upright and a red one when it's been turned over.
- A pour detector. Fix it to a jug or watering can and react when it's tipped to pour, to count pours or time them.
Common problems
- It never changes. Tip it well past level, not just a few degrees, and check S is in pin 3.
- It flickers when you set it down. The bead is still rolling. Use the hold-time sketch above.
- The reading is the wrong way round. Turn the module around, or swap
HIGHandLOWin theif. Both are fine.
Watch it on the bench
The KY-017 walkthrough in the free SensorKit course wires the module to pin 3 of a HERO Board and tilts it on camera, in about two minutes. The 37-in-1 sensor kit guide covers the rest of the case.
37-in-1 Sensor Kit: Both tilt switches, the KY-017 and the KY-020, plus 35 more modules and the free SensorKit course.
HERO Board: The Uno-compatible board every SensorKit walkthrough is filmed on, with its USB cable.
Questions
Does the KY-017 contain mercury?
Yes. The glass bulb holds a small bead of mercury that rolls onto the contacts when the module tilts. It's safe while sealed. If the glass breaks, don't touch it, and ask your local recycling center how to dispose of it.
Can the KY-017 measure an angle?
No. It's a switch: it tells you which side of level the bulb is on. To measure an angle you need an accelerometer.
What's the difference between the KY-017 and the KY-020?
The KY-017 uses a mercury bead in glass; the KY-020 uses a metal ball. The mercury switch reacts to a gentler tilt and settles cleanly. The ball switch needs a firmer tip and can rattle, but it has no glass to break.
Is the KY-017 analog or digital?
Digital. The bead either joins the contacts or it doesn't, so you read it with digitalRead().