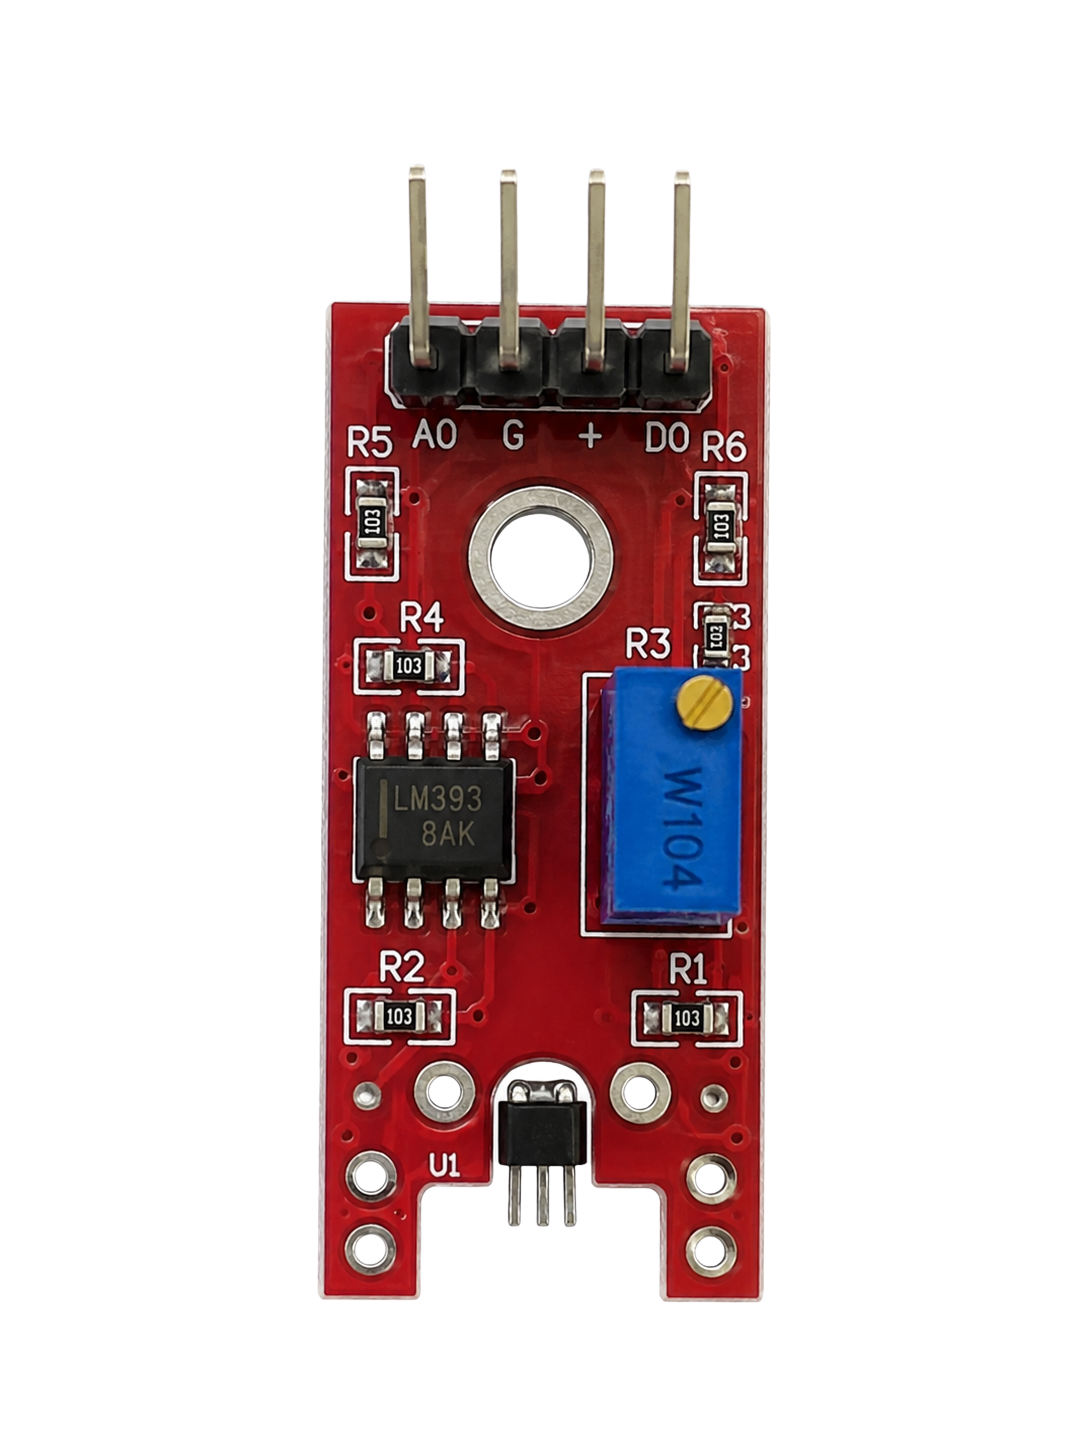
KY-024 linear Hall sensor module: how it works, wiring and code
Updated
The KY-024 doesn't just notice a magnet. It measures it. Its analog pin gives a number that climbs as one pole of a magnet comes closer and falls as the other pole does, so your code can tell how near a magnet is and which way round it's facing.
It's one of the seven red boards in the kit, and it has a digital pin too, set by a small knob. Which pin you read decides what the module can do for you.
What's on the board
- The linear Hall sensor, the small black three-legged part at the far end. Its output voltage follows the magnetic field: it rests around the middle with no magnet nearby, and moves up or down depending on which way the field points.
- An LM393 comparator chip that compares the sensor's voltage with a set point and switches the digital pin.
- A blue trim pot. Its brass screw moves that set point.
- Two LEDs. One shows power; the other lights when the digital pin trips.
- Four pins: A0 (analog out), G (ground), + (5 V) and D0 (digital out). In the walkthrough it's identified by the factory number HW-484 printed on the back.
The course's notes on the red boards say it plainly: they're detectors, not calibrated instruments. The KY-024 can tell you 'stronger' and 'which pole', but its numbers aren't in a unit like millitesla. Treat them as relative.
What the readings look like
On the bench in the course walkthrough, the analog pin sat at about 520 with no magnet nearby. Bringing a fridge magnet slowly up to the front of the sensor pushed it toward 700. Bringing the same magnet to the back of the sensor reversed the field through it, and the reading fell to about 300. That's the whole point of a linear Hall sensor: the reading moves both ways from the middle, and how far it moves tells you how strong the field is.
Your numbers will differ with your magnet and how close you get, but the shape will be the same: a resting value near the middle of the 0 to 1023 range, up for one direction of field, down for the other. The analog input article explains where those numbers come from.
Wiring
| Module pin | HERO Board pin | What it carries |
|---|---|---|
| A0 | A0 | Field strength and direction, 0 to 1023 |
| G | GND | Ground |
| + | 5V | Power |
| D0 | 3 | Past the set point or not |
Pins as the walkthrough's sketch uses them. The filmed circuit wires only A0, G and +; add D0 to use the digital half too.
The code
This module's lesson has no code tab, so this is the sketch typed on screen in the KY-024 walkthrough, tidied up. It reads both pins: D0 drives the board's L LED, and the A0 value goes to the Serial Monitor.
int ledPin = 13;      // the board's L LED
int digitalPin = 3;   // the module's D0 pin
int analogPin = A0;   // the module's A0 pin
int val;
int val2;

void setup() {
  pinMode(ledPin, OUTPUT);
  pinMode(digitalPin, INPUT);
  Serial.begin(9600);
}

void loop() {
  val = digitalRead(digitalPin);
  val2 = analogRead(analogPin);
  if (val == HIGH) {   // D0 has tripped
    digitalWrite(ledPin, HIGH);
  } else {
    digitalWrite(ledPin, LOW);
  }
  Serial.println(val2);
}Open the Serial Monitor at 9600 baud and bring a magnet in slowly. If the numbers scroll past too fast to read, add delay(100); at the end of loop().
Tell the poles apart
The digital pin can't do this. D0 compares the reading with a single set point, so it can only say 'past the line' in one direction. The analog pin sees both. This sketch measures the resting value when the board starts, then reports which way the field has pushed it:
const int HALL_A0 = A0;
int rest;

void setup() {
  Serial.begin(9600);
  rest = analogRead(HALL_A0);   // no magnet nearby at power-up
}

void loop() {
  int change = analogRead(HALL_A0) - rest;
  Serial.print(change);
  if (change > 50) {
    Serial.println("  one pole");
  } else if (change < -50) {
    Serial.println("  the other pole");
  } else {
    Serial.println("  no field");
  }
  delay(200);
}The 50 is a margin that ignores small drift; widen it if 'no field' flickers. Which pole counts as 'one' depends on which face of the sensor the magnet approaches, so name them by testing with a magnet you've marked.
Setting the knob
The knob only matters if you use D0. Hold the magnet where you want the trigger to happen and turn the screw slowly until the second LED on the board just comes on. Pull the magnet away, bring it back, and adjust until it switches at the same spot every time. That's the method the course's notes give for all the red boards: watch the threshold LED, and tune until the trigger point is consistent. Remember that D0 will only respond to the pole that moves the reading toward the set point.
Linear Hall, Hall switch or reed switch?
The KY-003 Hall sensor is the yes-or-no version: no knob, no analog pin, and it only flips when a magnet is close. The KY-025 reed switch is a red board like this one, but its sensor is a pair of metal reeds that snap shut, so it behaves as all or nothing and can't tell the poles apart. Choose the KY-024 when the amount or the direction of the field matters.
What to build with it
- A contact-free dial. Fix a small magnet to a knob above the sensor. Turning it changes the field through the sensor, and the reading follows, with nothing touching.
- A proximity gauge. Turn the reading into a row of lit LEDs or a rising buzzer pitch as a magnet gets closer. The map() function does the scaling.
- A magnet sorter. Use the pole sketch to mark which face of each magnet is which before you glue them into a project.
Common problems
- The reading sits near 500 and barely moves. Bring the magnet closer and face-on to the sensor. Small magnets only move it at short range.
- D0 never trips, or never lets go. Turn the knob. Then try the other pole: only one direction of field moves the reading toward the set point.
- Readings wander with no magnet. Check G really reaches ground. A loose ground makes every analog reading drift.
Watch it on the bench
The KY-024 walkthrough in the free SensorKit course wires the module to a HERO Board and shows the readings change with a fridge magnet, in under three minutes. The other six red boards and the rest of the case are in the 37-in-1 sensor kit guide.
37-in-1 Sensor Kit: The KY-024 and the other six red comparator boards, plus 30 more modules and the free SensorKit course.
HERO Board: The Uno-compatible board the walkthroughs use, with six analog inputs (A0 to A5) and its USB cable.
Questions
What does the KY-024 measure?
Magnetic field strength and direction, as a number on its analog pin. With no magnet it reads near the middle of the 0 to 1023 range; one pole raises the number and the other lowers it.
What's the difference between the KY-003 and the KY-024?
The KY-003 is a Hall switch: digital only, on or off. The KY-024 is a linear Hall sensor with an analog output that shows how strong the field is and which way it points, plus a digital output with an adjustable trip point.
What does the blue knob on the KY-024 do?
It sets the point where the digital pin D0 switches. Hold the magnet where you want the trigger and turn the screw until the board's second LED just lights.
Does the KY-024 read in gauss or tesla?
No. The course treats the red boards as detectors, not calibrated instruments. Its numbers are relative: higher or lower than the resting value, by more or less.