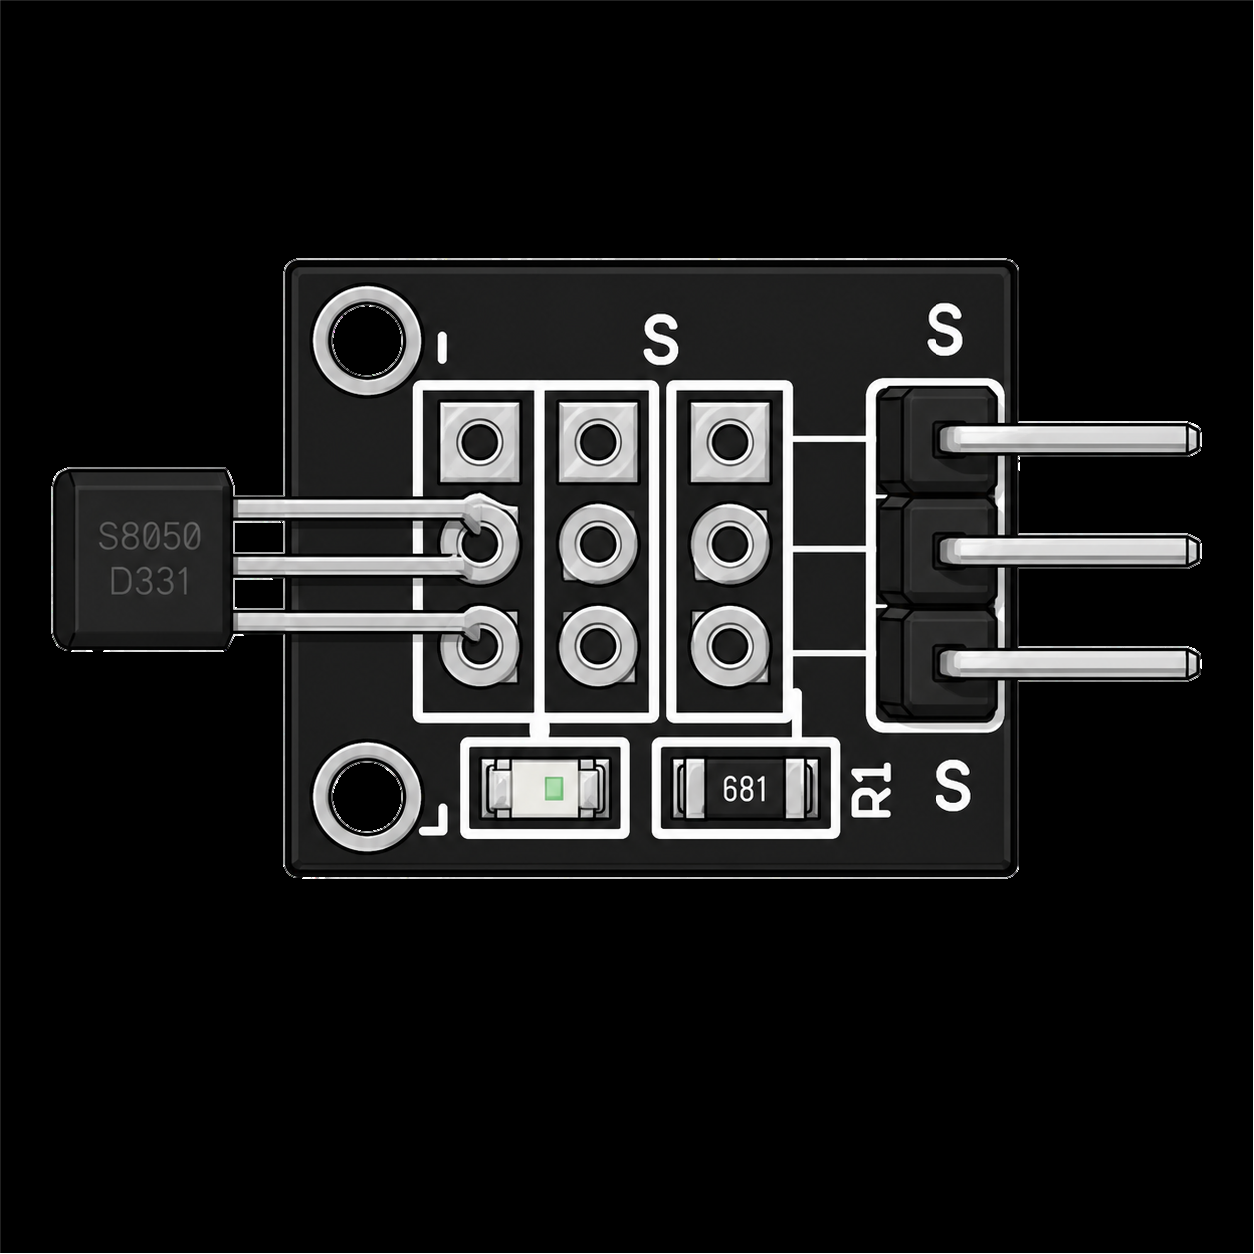
KY-003 Hall magnetic sensor module: how it works, wiring and code
Updated
The KY-003 notices magnets. Bring one near the small black sensor on its edge and the signal pin flips; take it away and it flips back. Nothing touches, nothing moves, and nothing wears out.
It's the module behind most 'is the door shut' and 'how fast is this wheel turning' projects. It's also the first of three magnet sensors in the kit, and knowing which of the three to reach for saves a lot of head scratching.
How a Hall sensor works
Send a current along a thin strip of semiconductor and hold a magnet near it, and the field pushes the moving charges toward one side of the strip. That leaves a tiny voltage across it, named after Edwin Hall, who discovered the effect in 1879. The sensor on the KY-003 measures that voltage, and a circuit inside the same three-legged package turns it into a clean switch: field strong enough, output on; field gone, output off.
Because the decision is made inside the sensor, the board around it is simple: the sensor, a resistor, a small LED and three pins (S for signal, + in the middle, − for ground). There's no knob. The KY-003 decides for itself how strong a field counts, which in practice means bringing the magnet close. In the course walkthrough it's identified by the factory number HW-477 printed on the board, which helps when you're hunting for it in the case.
Wiring
| Module pin | HERO Board pin | What it carries |
|---|---|---|
| S | 10 | The signal: LOW when a magnet is near |
| + (middle) | 5V | Power for the sensor |
| − | GND | Ground |
Pin 10 matches the course sketch.
The code, and the one word that matters
The course sketch lights the board's L LED while a magnet is near. It's short, but one word in it does a lot of work.
const uint8_t KY_003_PIN = 10;  // the module's S pin

void setup() {
  pinMode(LED_BUILTIN, OUTPUT);
  pinMode(KY_003_PIN, INPUT_PULLUP);
}

void loop() {
  if (digitalRead(KY_003_PIN) == LOW) {  // LOW = magnet detected
    digitalWrite(LED_BUILTIN, HIGH);
  } else
    digitalWrite(LED_BUILTIN, LOW);
  delay(100);
}That word is INPUT_PULLUP. It switches on a resistor inside the HERO Board's chip that gently holds the pin HIGH. The sensor pulls the line LOW when it sees a field and lets go when the field is gone, and the pull-up brings it back to HIGH. Without a pull-up somewhere, a released line floats and reads random noise. So the logic runs the opposite way to what you might expect: LOW means magnet, HIGH means no magnet.
You can watch it happen. Add Serial.begin(9600); to setup() and Serial.println(digitalRead(KY_003_PIN)); to the loop, then open the Serial Monitor at 9600 baud. On the bench in the walkthrough it printed 1 with nothing nearby and 0 the moment an ordinary fridge magnet came close. A bare hand changed nothing.
Getting a reliable trigger
- Try the other face of the magnet. Hall switches like this one usually respond to one pole only. If a magnet does nothing, turn it over before you suspect the wiring.
- Come in face-on. The sensor feels the field passing through its flat face. From the side, the magnet has to be much closer.
- Expect a clean edge. A Hall switch turns on at one field strength and off at a slightly weaker one, so the output doesn't chatter when the magnet hovers at the limit. And with no contacts, there's no bounce to filter out when you count.
Hall sensor, linear Hall or reed switch?
| KY-003 Hall | KY-024 Linear Hall | KY-025 Reed switch | |
|---|---|---|---|
| Senses with | A Hall switch | A linear Hall sensor | Two metal reeds in a glass tube |
| Outputs | Digital only | Analog and digital | Analog and digital |
| Knob | No | Yes, sets the digital trip point | Yes, sets the digital trip point |
| Tells poles apart | Usually answers one pole only | Yes: one pole raises the reading, the other lowers it | No: either pole closes it |
| Moving parts | None | None | Yes, the reeds flex |
The three magnet modules in the 37-in-1 kit.
Pick the KY-003 when you only need yes or no, with nothing to tune and nothing to wear out. Pick the KY-024 linear Hall when distance or polarity matters: in its walkthrough the reading sat near 520, rose toward 700 for one direction of field and fell toward 300 for the other. Pick the KY-025 reed switch when you want a contact that any magnet closes, either way round.
What to build with it
- A door or lid sensor. Glue a small magnet to the door and fix the module to the frame. Shut, the pin reads LOW; open, HIGH. Sound a buzzer on the change.
- A wheel speedometer. A magnet on a spoke passes the sensor once per turn. Count the moments the pin goes LOW in each second and you have turns per second; multiply by the wheel's circumference for speed.
- A hidden switch. Put the sensor behind a thin wooden or plastic panel and 'press' it with a magnet. A magnetic field passes straight through both.
Common problems
- Nothing changes. Check S is in pin 10 and the sketch says
INPUT_PULLUP. Then turn the magnet over and come in face-on. - It reads LOW with no magnet in sight. Look for one you've forgotten: magnetic screwdriver tips, speaker magnets and phone cases all count. Then check + and − aren't swapped.
- Readings flicker at random. The pin is floating. Keep
INPUT_PULLUPas the course sketch does, and make sure − really reaches GND.
Watch it on the bench
The KY-003 walkthrough in the free SensorKit course wires it to a HERO Board and shows the 1 and 0 in the Serial Monitor, in under three minutes. The digital I/O article covers INPUT versus INPUT_PULLUP in more depth, and the 37-in-1 sensor kit guide lists every other module in the case.
37-in-1 Sensor Kit: All three magnet modules (KY-003, KY-024 and KY-025) and 34 more, with the free SensorKit course's filmed walkthroughs.
HERO Board: The Uno-compatible board the walkthroughs are filmed on, with its USB cable.
Questions
Is the KY-003 analog or digital?
Digital. It switches between HIGH and LOW. For a reading of how strong the field is, use the KY-024 linear Hall module, which has an analog output.
Why does the KY-003 read LOW when a magnet is near?
The sensor pulls its output to ground when it detects a field, and a pull-up resistor holds it HIGH the rest of the time. So LOW means magnet. That's why the course code uses INPUT_PULLUP and checks for LOW.
Does the KY-003 detect both poles of a magnet?
Hall switches like the one on this module usually respond to one pole. If nothing happens, turn the magnet over. If you need both poles, use the KY-024 or the KY-025.
What magnet do I need for the KY-003?
Any small permanent magnet. The course walkthrough uses an ordinary fridge magnet.