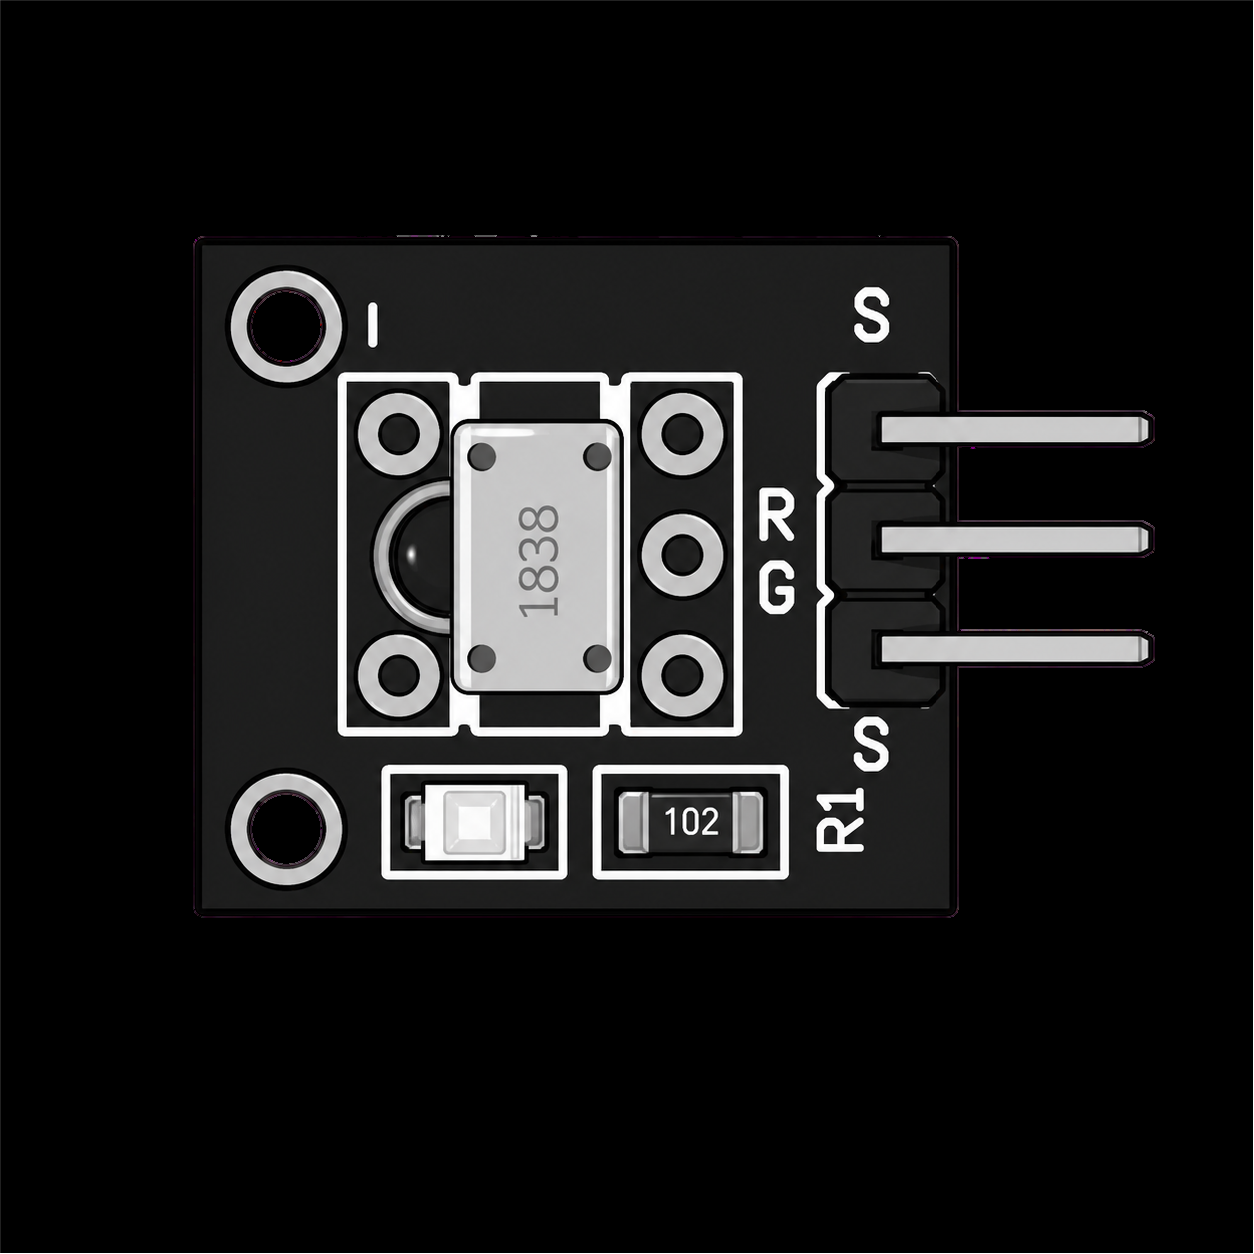
KY-022 IR receiver module: wiring and remote control code
Updated
Point a TV remote at the KY-022, press a button, and a number appears in your Serial Monitor. Press another, and you get a different number. Those numbers are all it takes to control anything you build from across the room.
The module does the hard part in hardware: it picks the remote's signal out of all the other infrared light around you. Here's how it does that, how to wire it to the HERO Board, and the code that turns button presses into actions.
What's on the board
- An IR receiver: the part marked 1838, of a common type tuned to 38 kHz. Inside its package are a photodiode, an amplifier, a filter that passes only that frequency, and a demodulator that turns the flashing into a clean signal.
- A small LED with its resistor (marked 102), which flickers as signals arrive. In the walkthrough you can see it blink with each button press.
- A 3-pin header: S for the signal, the middle pin for 5 V, and minus for ground.
How a remote talks
A remote's LED doesn't simply switch on. It flashes infrared about 38,000 times a second, in bursts, and the pattern of bursts and gaps is the message. The receiver ignores steady infrared from sunlight and lamps, listens only for flashing at its frequency, and hands your board a clean signal: high while nothing is arriving, low during each burst.
Many remotes use a protocol called NEC. One button press sends:
- a 9 ms burst and a 4.5 ms gap, which mean "a message is starting";
- 32 bits: an address byte, the same byte inverted, a command byte, and that byte inverted. Each bit is a burst of about 0.56 ms followed by a gap of the same length for a 0, or three times as long for a 1;
- one last short burst to finish.
Sending each byte twice, once inverted, lets the receiving end check it arrived intact. Hold the button down and the remote stops repeating the message. Instead it sends a short repeat signal about every 108 ms, which means "still held". The IRremote library times all of this for you and hands back the address and the command.
Wiring the KY-022 to the HERO Board
| KY-022 pin | HERO Board | What it carries |
|---|---|---|
| S | Pin 10 | The decoded signal |
| Middle (+) | 5V | Power |
| Minus (-) | GND | Ground |
The course's code uses pin 10; in the walkthrough the wire goes to pin 11. Either works, as long as RECV_PIN matches the wire.
The code
Install IRremote from the Library Manager; the walkthrough uses the latest version. This is the course's sketch, which uses the library's current IrReceiver interface:
#include <IRremote.hpp>

const int RECV_PIN = 10;   // the module's S pin

void setup() {
  Serial.begin(115200);
  IrReceiver.begin(RECV_PIN, ENABLE_LED_FEEDBACK);   // start listening; flash the board's LED on each signal
}

void loop() {
  if (IrReceiver.decode()) {
    Serial.print("Command # : ");
    Serial.println(IrReceiver.decodedIRData.command, HEX);
    Serial.print("Raw data  : ");
    Serial.println(IrReceiver.decodedIRData.decodedRawData, HEX);
    IrReceiver.resume();   // ready for the next one
  }
}Many older tutorials start the receiver with IRrecv irrecv(RECV_PIN); and irrecv.enableIRIn();. That style comes from IRremote 2 and current versions warn about it; IrReceiver.begin(), as above, is the way now. Open the Serial Monitor at 115200 baud and press some buttons.
Each press prints two values. Command is the one to use: the button's own code, a small number that's the same every time you press that button. Raw data is the whole 32-bit message, address and checks included. Write down the command for each button you plan to use.
Make the buttons do something
Once you know your remote's codes, a switch statement turns them into actions. The two codes below are the CH- and CH buttons on a common 21-key remote; replace them with the ones your remote printed.
#include <IRremote.hpp>

const int RECV_PIN = 10;

void setup() {
  pinMode(LED_BUILTIN, OUTPUT);
  IrReceiver.begin(RECV_PIN);
}

void loop() {
  if (!IrReceiver.decode()) return;   // nothing new

  // a held button sends repeats: act only on the first press
  if (!(IrReceiver.decodedIRData.flags & IRDATA_FLAGS_IS_REPEAT)) {
    switch (IrReceiver.decodedIRData.command) {
      case 0x45: digitalWrite(LED_BUILTIN, HIGH); break;   // your "on" button
      case 0x46: digitalWrite(LED_BUILTIN, LOW);  break;   // your "off" button
    }
  }
  IrReceiver.resume();
}The repeat check means one press makes one change, however long you hold the button. Drop it when you want a held button to keep acting, like holding volume up.
Common problems
- Holding a button prints FFFFFFFF. That's the repeat signal. Older versions of the library printed it as a row of F's, which is what the walkthrough shows; current versions flag it as a repeat. Ignore it, or treat it as "still held".
- Some remotes do nothing. In the walkthrough a TV remote worked and some smaller remotes didn't. The receiver is tuned to 38 kHz, and a remote that flashes at another frequency, or speaks a protocol the library doesn't recognize, may never decode. Try another remote before you blame the wiring.
- Nothing from any remote. Check that S is on the pin in
RECV_PIN. Then check the remote itself: many phone cameras show an IR LED as a faint flicker when you press a button. - Your codes don't match a tutorial's. Every remote has its own. Print yours first, then copy them into your code.
- It only works close up. Strong sunlight floods the receiver with infrared. It works best indoors, aimed at the remote.
What to build with it
- Remote-controlled colors. Set the kit's KY-016 RGB LED to a different color from each numbered button.
- A remote switch. Drive the KY-019 relay from two buttons to turn a small fan on and off.
- A secret code. A lock that opens only when you press the right buttons in the right order.
- A robot remote. Forward, back, left and right on four buttons.
Watch it, or try it first
The KY-022 walkthrough is lesson 17 of the SensorKit course, and every module in the 37-in-1 sensor kit has the others. No remote to hand? The KY-022 is a part in the free browser simulator, where it opens an on-screen remote while your sketch runs, sending the same NEC signals as a real one.
37-in-1 Sensor Kit: The KY-022 and 36 more modules in a latching case, with the free SensorKit course: 31 filmed walkthroughs and example code.
HERO Board: The Uno-compatible board the SensorKit walkthroughs are built around, with its USB cable.
Questions
Which library does the KY-022 need?
IRremote, from the Library Manager. It times the remote's signal and gives you each button's command code.
Why does my IR receiver print FFFFFFFF?
That's the repeat signal a remote sends while a button is held. Older versions of IRremote print it as FFFFFFFF; current ones mark it with a repeat flag you can check.
Does the KY-022 work with any remote?
Most TV-style remotes that flash at 38 kHz work. Remotes on another frequency or an unusual protocol may not decode, so if one remote does nothing, try another.
Which pin does the KY-022 connect to?
Any digital pin. The SensorKit course uses pin 10 for S, with the middle pin on 5V and minus on GND; set RECV_PIN to whichever pin you use.