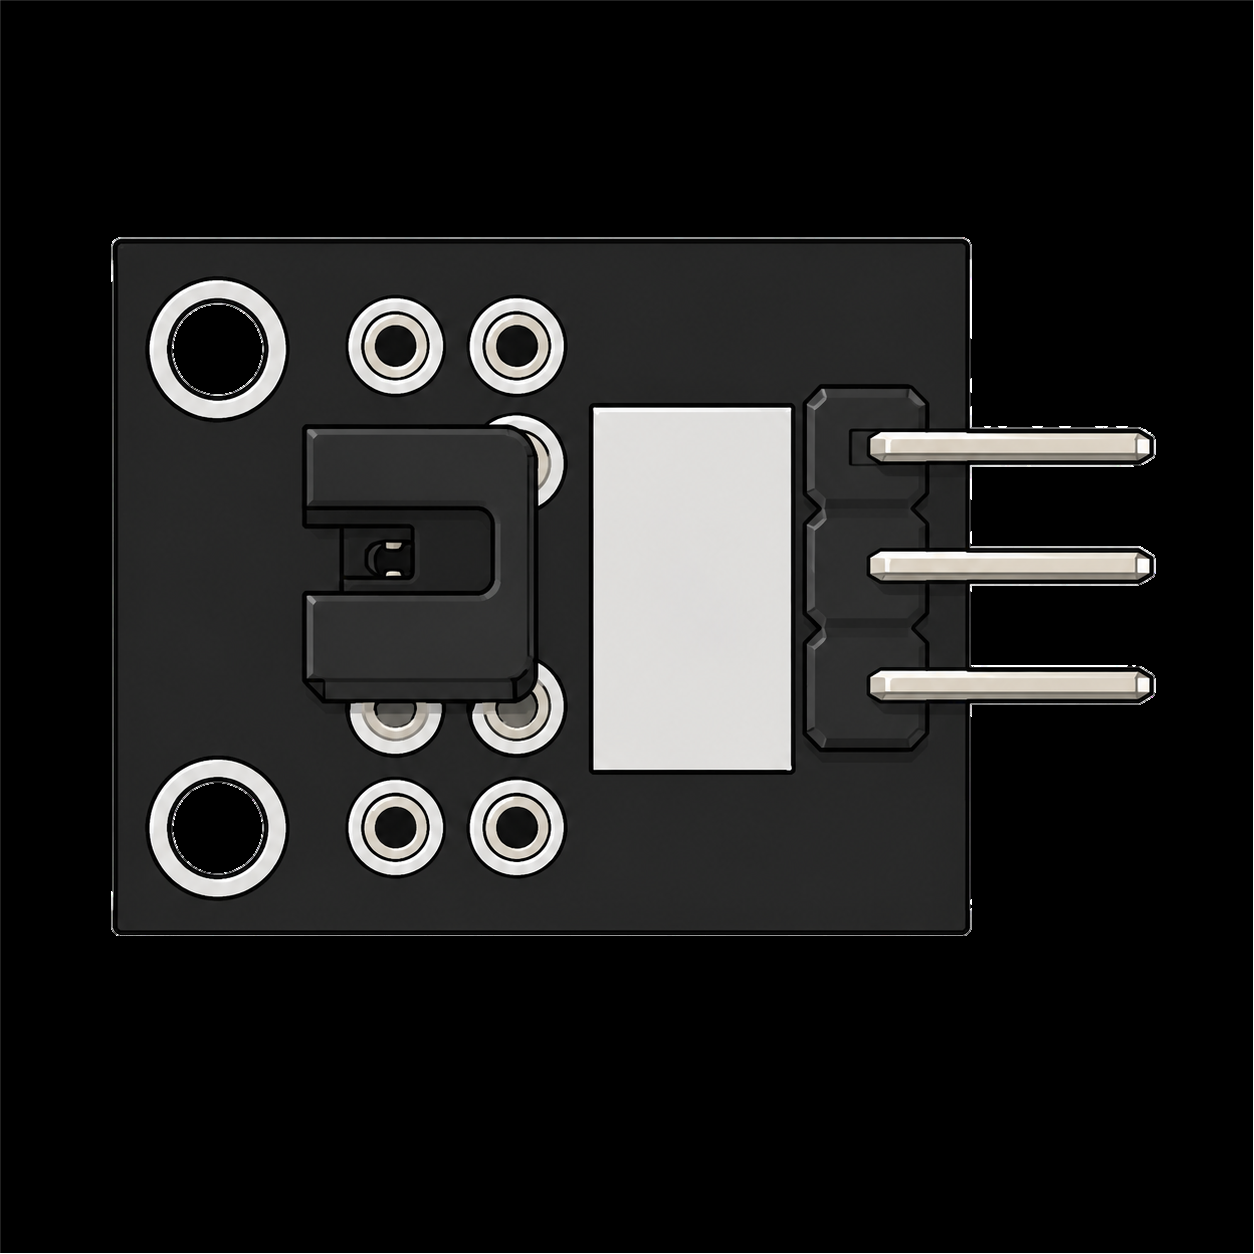
KY-010 light blocking module (photo interrupter): how it works, wiring and code
Updated
The KY-010 is a beam with a gap in it. One arm of the U-shaped part shines invisible infrared light across the slot, and the other arm watches for it. Slide a card, a flag or the tooth of a gear into the slot, the beam breaks, and the signal pin tells your board.
It's the sensor to use when something has to pass one exact point: a lid closing, a coin dropping, a wheel turning. And because nothing ever touches it, it never wears out.
How a photo interrupter works
The black U is a photo interrupter: an infrared LED in one arm faces a phototransistor in the other. While light crosses the gap, the phototransistor conducts and holds the signal at one level. Block the gap and it stops conducting, so the signal swings the other way. On this module the signal reads HIGH while the slot is blocked and LOW while it's clear, which is how both the course sketch and the simulator's KY-010 treat it.
It's an on/off sensor: no analog output, no knob. It either sees the beam or it doesn't. That makes it the most dependable of the kit's infrared modules, because it doesn't care about the color of the object or how far away the wall is. The one thing it needs is an object that really blocks infrared. Card, wood and metal all do. Clear plastic, and even some dark plastics, let infrared straight through, so test what you plan to use.
Wiring
The pins aren't labelled on the top of every board. Turn it over, as the instructor does in the walkthrough, and you'll find − at one end and S at the other. The middle pin is +.
| Module pin | HERO Board pin | What it carries |
|---|---|---|
| S | 2 | The signal: HIGH while the slot is blocked |
| + (middle) | 5V | Power for the LED and the sensor |
| − | GND | Ground |
Pin 2 matches the course sketch.
The code from the course
The course sketch reuses the stock button example, because a photo interrupter behaves exactly like a button that something else presses. Here it is with the names changed to say what they really are.
const int beamPin = 2;   // the module's S pin
const int ledPin = 13;   // the board's L LED

int beamState = 0;

void setup() {
  pinMode(ledPin, OUTPUT);
  pinMode(beamPin, INPUT);
}

void loop() {
  beamState = digitalRead(beamPin);
  if (beamState == HIGH) {   // something is in the slot
    digitalWrite(ledPin, HIGH);
  } else {
    digitalWrite(ledPin, LOW);
  }
}Upload it and push a piece of card into the slot. The L LED lights while the card is there and goes out when you pull it free.
Counting things that pass
Lighting an LED proves the sensor works. Counting is where it earns its place. The trick is to count the moment the beam becomes blocked, not every pass of the loop while it is, or one card counts thousands of times. Keep the last reading and compare:
const int beamPin = 2;
int lastState = LOW;
long count = 0;

void setup() {
  pinMode(beamPin, INPUT);
  Serial.begin(9600);
}

void loop() {
  int state = digitalRead(beamPin);
  if (state == HIGH && lastState == LOW) {  // the beam just got blocked
    count++;
    Serial.println(count);
  }
  lastState = state;
}There are no metal contacts in a photo interrupter, so there's nothing to bounce, and this simple version usually counts cleanly. If a slow, fuzzy edge ever counts twice, add the timing check from the debouncing article.
What to build with it
- A wheel speed counter. Cut slots in a cardboard disc, fix it to a motor shaft so the slots pass through the gap, and count pulses for one second. Divide by the number of slots and you have turns per second.
- An open-or-closed detector. A tab on a lid or flap drops into the slot when it shuts. This is the use the instructor suggests in the walkthrough.
- A coin or marble counter. Drop things down a chute that passes through the slot, and let the counting sketch keep score.
- A home position. A flag on a moving arm breaks the beam when the arm is back at the start, so your code knows where zero is. Printers and scanners use the same trick.
Light blocking, obstacle or line sensor?
The kit has three infrared modules. The KY-010 looks across a fixed gap, so it only sees what passes through its slot. The KY-032 obstacle sensor and the KY-033 line tracker look outward and catch light bouncing back off a surface, so they can see things in front of them, at the cost of being fussier about color, distance and sunlight. Whenever you can make the object pass through a slot, the KY-010 is the most reliable of the three.
Common problems
- The LED never changes. Check S is in pin 2 and the middle pin has 5 V. If it's still dead, the module may be wired back to front: find − and S on the underside and rewire.
- Your object doesn't trigger it. It's either too thin to cover the beam or see-through to infrared. Black card or a strip of metal blocks reliably.
- One pass counts many times. You're counting readings, not changes. Use the counting sketch, which only counts the moment the beam becomes blocked.
- It reads blocked with an empty slot. Look for dust, a scrap of tape or a bent arm in the gap.
Watch it on the bench
The KY-010 walkthrough in the free SensorKit course wires the module to pin 2 of a HERO Board and blocks the slot with a spare board, in just over two minutes. The 37-in-1 sensor kit guide covers every other module in the case.
37-in-1 Sensor Kit: The KY-010 and the kit's other infrared modules, with filmed walkthroughs and code in the free SensorKit course.
Questions
What is the KY-010 module?
A photo interrupter on a small board: an infrared LED and a light sensor face each other across a slot. Anything that blocks the slot changes the signal pin, which you read with digitalRead().
Does the KY-010 output HIGH or LOW when the beam is blocked?
HIGH while something blocks the slot and LOW while the beam is clear, which is how the course sketch and the simulator treat it. Print the pin in the Serial Monitor to confirm on your own module.
Why can't I see the light in the KY-010?
It's infrared, which your eyes can't see. Some phone cameras show an infrared LED as a faint purple glow.
Can the KY-010 measure speed?
Yes, by counting. Spin a slotted disc through the gap, count pulses for a second and divide by the number of slots to get turns per second.